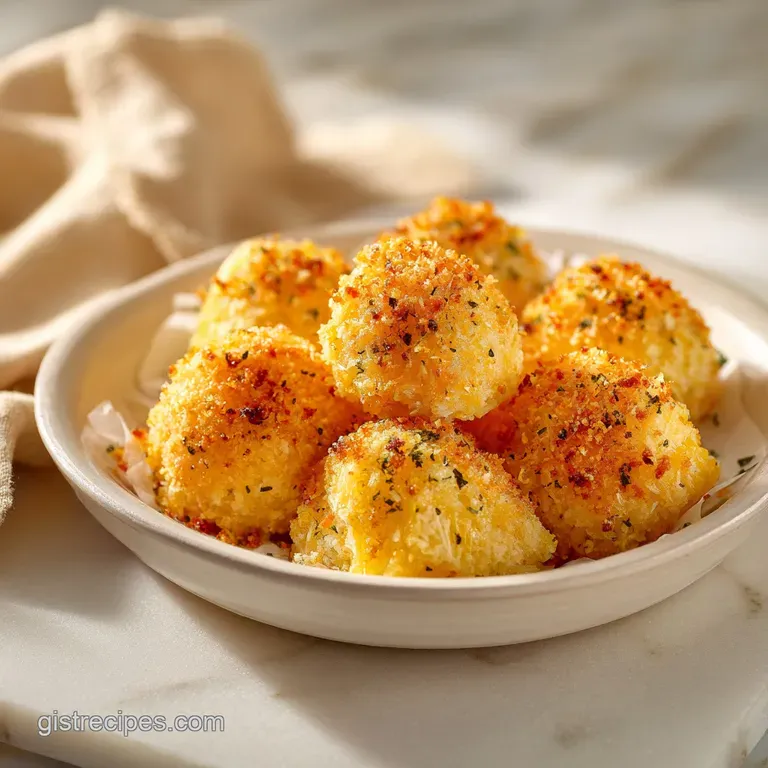
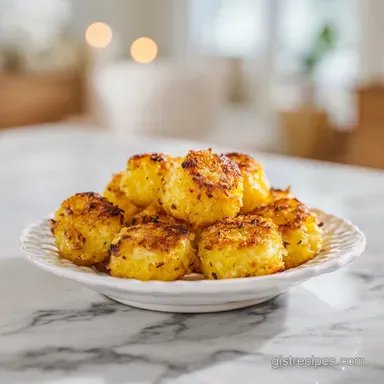
Golden-Crusted Coconut Pineapple Bites
- Time:15 minutes active + 20 minutes cook + 30 minutes chilling = 65 minutes total
- Flavor/Texture Hook: Tropical, nutty, and juicy with a satisfyingly fibrous crunch.
- Perfect for: Stress free hosting, healthy lunchbox treats, or a quick summer dessert.
- Making the Ultimate Golden Coconut Pineapple Bites
- The Secret to the Perfect Texture
- Deep Dive Into Key Components
- The Simple Ingredients You'll Need
- Tools for a Stress Free Kitchen
- Step-by-Step Guide to Success
- Solving Common Kitchen Mishaps
- Creative Swaps and Recipe Tweaks
- Storage and Reheating Advice
- What to Serve These With
- Recipe FAQs
- 📝 Recipe Card
Making the Ultimate Golden Coconut Pineapple Bites
Imagine walking through a bustling street market in Recife, Brazil. The air is thick with the scent of ripening fruit, but one aroma always cuts through the humidity: the sweet, charred fragrance of pineapple being grilled over open flames.
People there have a deep respect for the "King of Fruits," often pairing it with spices or coconut to balance its sharp acidity. These bites are my tribute to that tradition, designed for those of us who want that sun drenched flavor without needing to fire up a massive charcoal pit in the backyard.
I first tried making a version of these years ago for a friend’s barbecue, and honestly, it was a disaster. I didn't dry the fruit enough, and the coconut just slid off into a sad, soggy puddle at the bottom of the pan.
But after playing around with the binders, I realized that treating the fruit more like you’re breading a piece of chicken using a dry to wet to-dry approach is what actually gives you that shatter crisp exterior.
It’s a total vibe for when you want something sweet but don't want to spend hours weighing out flour and butter.
We are aiming for that specific moment in the kitchen where the smell of toasted coconut starts to fill the room, mixing with the bright, floral scent of lime and vanilla. It’s a stress free process that yields something far more impressive than the effort suggests.
You’re going to love how the mahogany brown edges of the coconut provide a bitter sweet contrast to the golden, dripping center of the fruit. Let's get into why this method actually works so well.
The Secret to the Perfect Texture
Most people think you can just toss wet fruit in coconut and call it a day, but that’s how you end up with a mess. This recipe works because we are essentially creating a self hydrating crust. The arrowroot isn't just there for fun; it’s the structural engineer of this whole operation.
- Surface Tension Control: Patting the pineapple extremely dry removes "free water" that would otherwise steam the coating from the inside out, making it fall off.
- Starch Gelatinization: The arrowroot powder reacts with the small amount of lime juice and maple syrup to create a sticky, invisible glue that bonds the coconut flakes to the fruit.
- The Moisture Barrier: Shredded coconut acts as an insulator, allowing the pineapple to steam in its own juices while the exterior caramelizes through direct heat.
- Structure Setting: Refrigerating the bites for 30 minutes after baking allows the sugars in the maple syrup to harden, turning a soft coating into a firm, snackable shell.
| Cooking Method | Total Time | Texture Result | Best Used For |
|---|---|---|---|
| Stovetop Searing | 10 minutes | Charred, soft, and very juicy | Immediate serving over ice cream |
| Oven Roasting | 20 minutes | Crispy, firm, and easy to hold | Party platters and meal prep snacks |
| Air Fryer | 12 minutes | Extra crunchy but prone to drying | Small batches for personal snacking |
Choosing between the stovetop and the oven really comes down to how you plan to eat them. If you want a "fork and knife" dessert, the stovetop gives you that intense caramelization. But for actual bites you can pick up with your fingers, the oven is king.
The dry heat of the oven allows the coconut to dehydrate and crisp up in a way that a pan simply can't match.
Deep Dive Into Key Components
Understanding your ingredients is the difference between a "good" snack and one that people beg you for the recipe. We aren't just throwing things in a bowl; we are balancing fats, acids, and starches to get that velvety mouthfeel.
| Ingredient | Role in Recipe | Pro Secret |
|---|---|---|
| Fresh Pineapple | Provides the juicy, acidic core | Use a fruit that smells sweet at the base; if it has no scent, it has no sugar. |
| Shredded Coconut | Creates the structural "jacket" | Always use unsweetened to control the browning; sweetened versions burn too fast. |
| Arrowroot Powder | Acts as the primary binder | It remains clear and flavorless, unlike flour, which can taste "pasty" here. |
| Maple Syrup | Provides glue and caramelization | The darker the syrup (Grade B), the more intense the "toasted" flavor will be. |
Using fresh pineapple is non negotiable here. Canned pineapple is often sitting in heavy syrup or juice, which compromises the cellular structure of the fruit. When you bake canned pineapple, it tends to collapse into mush.
Fresh cubes have the structural integrity to stand up to the 190°C (375°F) heat, staying firm enough to provide a nice "snap" when you bite into them.
The Simple Ingredients You'll Need
Gathering your supplies is half the battle. This list is short, which means every single item has a big job to do. Don't skip the salt it might seem weird in a fruit recipe, but it’s what makes the pineapple flavor actually "pop" against the richness of the coconut.
- 1 fresh pineapple (approx. 2 cups): Cut into 1 inch (2.5 cm) cubes. Why this? Fresh fruit provides the necessary acidity and structure for a juicy center.
- 1 tablespoon lime juice: Freshly squeezed is best. Why this? The acid cuts through the fat of the coconut and prevents the fruit from tasting one dimensional.
- 1 teaspoon vanilla extract: Use the real stuff if you can. Why this? Vanilla rounds out the tropical flavors, making them taste like a high end dessert.
- 1.5 cups unsweetened shredded coconut: Fine or medium shred works. Why this? The small pieces create a more uniform, "opaque" jacket than large flakes.
- 2 tablespoons arrowroot powder: Our gluten-free binding agent. Why this? It creates a crisp, thin crust that doesn't feel heavy or bready.
- 2 tablespoons maple syrup: For sweetness and stickiness. Why this? It caramelizes at a lower temperature than granulated sugar, aiding the browning process.
- 0.25 teaspoon sea salt: Just a pinch. Why this? Salt balances the sugars and suppresses the bitterness of the toasted coconut.
| Original Ingredient | Substitute | Why It Works |
|---|---|---|
| Arrowroot Powder | Cornstarch | Similar thickening properties. Note: May result in a slightly more "powdery" mouthfeel. |
| Maple Syrup | Honey | Provides the same sticky binding. Note: Honey browns much faster; watch the oven closely. |
| Shredded Coconut | Almond Meal | Provides a nutty, fatty exterior. Note: You lose the signature tropical crunch. |
If you find yourself missing the lime, a tiny bit of orange juice can work, but the flavor will be significantly sweeter. The lime is really there to provide a "zing" that keeps you coming back for another piece. For more tropical inspiration, you might enjoy my Pineapple Jalapeno Chutney which uses similar flavor profiles in a savory way.
Tools for a Stress Free Kitchen

You don't need a professional pastry kitchen to pull this off, but a few specific tools will make your life much easier. The goal is to keep the coconut on the fruit and off your hands as much as possible.
- Large Baking Sheet: You want plenty of room so the bites don't steam each other.
- Parchment Paper: Essential. The maple syrup will stick to a bare pan like superglue.
- Paper Towels: For the most important step drying the pineapple.
- Two Medium Bowls: One for the "wet" fruit and one for the "dry" coating.
- Wire Cooling Rack: This allows air to circulate under the bites so the bottoms don't get soggy while cooling.
Having a good set of tongs can also be a lifesaver if you don't want to get "club hand" from the sticky coconut mixture. I usually use one hand for the wet fruit and one hand for the dry coating it’s an old breading trick that keeps things moving quickly.
step-by-step Guide to Success
Follow these steps closely, and pay attention to the sensory cues. Your kitchen should start smelling like a toasted macaroon about halfway through the baking time.
- Prep the fruit. Pat the pineapple cubes extremely dry using paper towels. Note: If they are wet, the coating will slide off during baking.
- Flavor the base. In a medium bowl, toss the dry cubes with 1 tablespoon lime juice and 1 teaspoon vanilla extract until every side is glistening.
- Mix the coating. In a separate bowl, whisk 1.5 cups shredded coconut, 2 tablespoons arrowroot, and 0.25 teaspoon sea salt.
- Add the binder. Drizzle in 2 tablespoons maple syrup and stir until the mixture looks like damp, clumpy sand.
- Dredge the cubes. Press each pineapple cube firmly into the coconut mixture, rotating to ensure a thick, opaque jacket.
- Arrange the pan. Place bites on a parchment lined sheet, leaving 1.3 cm (half an inch) of space between each.
- Roast to perfection. Bake at 190°C (375°F) for 18–20 minutes until the coconut tips are mahogany brown and smell nutty.
- Initial rest. Let the bites sit on the hot pan for 5 minutes until the base of the crust firms up.
- Flash chill. Transfer to a wire rack and refrigerate for 30 minutes until the structure is set and the exterior is cold.
Chef's Tip: If you want an even thicker crust, you can do a "double dip." After the first dredge, let them sit for 2 minutes, then press them into the coconut mixture one more time. It makes them extra chunky and decadent!
Solving Common Kitchen Mishaps
Even the simplest recipes can have a few hiccups. Most issues with fruit bites come down to moisture management or temperature control. If things aren't looking right, don't panic it's usually an easy fix.
Why Your Bites Are Soggy
If the bottom of your bites feels mushy or wet, it usually means the fruit was too juicy when it went into the oven, or they were crowded too closely together. When fruit is packed tight, the evaporating steam has nowhere to go, so it gets trapped under the crust.
Why the Coconut is Burning
Coconut has a very high oil content and a lot of surface area, meaning it can go from golden to burnt in about 60 seconds. If your oven has "hot spots," you might see the bites in the back browning faster than the ones in the front.
| Problem | Root Cause | Solution |
|---|---|---|
| Coating falling off | Fruit was too wet | Pat pineapple with a fresh towel until it's tacky, not slippery. |
| Burnt coconut edges | Oven temp too high | Reduce heat to 175°C (350°F) and increase time by 5 minutes. |
| Chewy, not crispy | Chilling step skipped | The 30 minute fridge rest is mandatory for setting the sugars. |
Common Mistakes Checklist:
- ✓ Never use pineapple that is over ripe or "leaking" juice; it will dissolve the crust.
- ✓ Don't skip the arrowroot; it's the only thing holding the coconut flakes together.
- ✓ Always use a parchment liner; silicone mats can sometimes trap too much moisture underneath.
- ✓ Ensure your oven is fully preheated before the tray goes in to "shock" the exterior into crisping.
- ✓ Resist the urge to eat them warm; they truly need that cold set to reach their best texture.
Creative Swaps and Recipe Tweaks
One of the best things about these treats is how easy they are to customize. You can take them from a simple afternoon snack to a "gourmet fruit appetizer" with just one or two small changes.
- Pina Colada Style: Swap the vanilla extract for a teaspoon of rum extract (or a splash of dark rum) to give them that classic cocktail flavor.
- Spicy Kick: Add a tiny pinch of cayenne pepper or chili flakes to the coconut mixture. The heat pairs beautifully with the sweet pineapple.
- Protein Boost: Replace half of the arrowroot powder with a neutral flavored collagen powder or whey isolate.
- Chocolate Drizzle: Once the bites are chilled and set, drizzle them with melted dark chocolate for a "Mounds bar" inspired treat.
If you are hosting a party and want a variety of textures, these pair wonderfully alongside my Broccoli Cheese Bites. The contrast between the sweet tropical fruit and the savory, cheesy broccoli makes for a really balanced appetizer spread that caters to everyone.
Storage and Reheating Advice
Because of the high moisture content in the pineapple, these are best eaten within the first 24 to 48 hours. However, you can definitely store them if you have leftovers.
Fridge Storage: Keep them in a single layer in an airtight container. If you stack them, put a piece of parchment paper between the layers to keep the crusts from sticking together. They will stay fresh for up to 3 days, though they will lose some of their initial crunch.
Freezing: You can freeze these! Lay them out on a tray until solid, then pop them into a freezer bag for up to 2 months.
Reheating: To bring back the crunch, don't use the microwave (it will turn them into mush). Instead, put them back in a 180°C (350°F) oven or air fryer for 3–5 minutes until the coconut sizzles again.
Let them cool slightly before eating so the crust can re harden.
Zero Waste Tip: Don't throw away the pineapple core or the leftover coconut bits! Simmer the core with some water and sugar to make a simple syrup for cocktails, and use the leftover "damp sand" coconut mixture as a topping for your morning oatmeal or yogurt.
What to Serve These With
These bites are surprisingly versatile. While they are great on their own, they also play well with other flavors, especially creamy or tangy components.
- As a Dessert: Serve them cold with a big dollop of Greek yogurt or a scoop of coconut milk ice cream. The temperature contrast is amazing.
- As a Brunch Side: They are a fantastic "fancy" fruit option alongside some sourdough toast or a light frittata.
- In a Salad: Chop them in half and toss them into a spinach salad with some grilled chicken and a lime vinaigrette.
- Cocktail Garnish: Skewer a single bite and rest it on the rim of a cold drink for a "gourmet fruit appetizer" look.
There is a common myth that you can't use fresh pineapple in recipes because the enzymes (bromelain) will break down the other ingredients. While that's true for things like gelatin or certain dairy products, the heat of the oven actually deactivates those enzymes, making these perfectly safe to pair with almost anything.
Another myth is that you need egg whites to make the coconut stick. As we’ve seen, the combination of maple syrup and arrowroot creates a much lighter, cleaner tasting bond that allows the fruit flavor to shine through. Enjoy your tropical escape!

Recipe FAQs
Why is it necessary to pat the pineapple cubes dry with paper towels?
Excess moisture prevents the coconut crust from adhering. If the pineapple is wet, the arrowroot mixture will slide off the fruit during baking instead of forming that necessary opaque jacket.
How to achieve the perfect mahogany brown color on the coconut?
Bake the bites at 375°F for exactly 18 20 minutes. Keep a close watch during the final minutes, as coconut shreds can transition from toasted to burnt very quickly once they hit the target color.
Is it possible to skip the 30-minute refrigeration step?
No, refrigeration is essential for setting the structure. The maple syrup and arrowroot need time to cool and solidify, otherwise the bites will be too fragile to handle when you pick them up.
How to store leftovers so they don't lose their crunch?
Store in a single layer in an airtight container with parchment paper between them. Since pineapple is naturally high in moisture, keeping them separated prevents the base of the bites from becoming soggy against one another.
Can I use a different thickener instead of arrowroot powder?
Stick with arrowroot for the best results. It is specifically chosen to bind the maple syrup and coconut into a stable crust; if you enjoyed the gluten-free dough balancing techniques found in other recipes, you will appreciate how this specific ratio ensures the coating stays firmly attached.
Is it true I can freeze these bites for later?
Yes, they freeze quite well. Arrange the finished bites on a tray to freeze them solid first, then transfer them into a sealed freezer bag to prevent freezer burn until you are ready to serve.
How to tell when the bites are ready to come out of the oven?
Look for a deep mahogany brown color on the coconut tips. Beyond the visual cue, your kitchen should emit a strong, nutty aroma similar to a freshly toasted macaroon when they are perfectly baked.
Golden Coconut Pineapple Bites
Ingredients:
Instructions:
Nutrition Facts:
| Calories | 57 kcal |
|---|---|
| Protein | 0.5 g |
| Fat | 3.9 g |
| Carbs | 5.7 g |
| Fiber | 1.2 g |
| Sugar | 2.9 g |
| Sodium | 29 mg |
