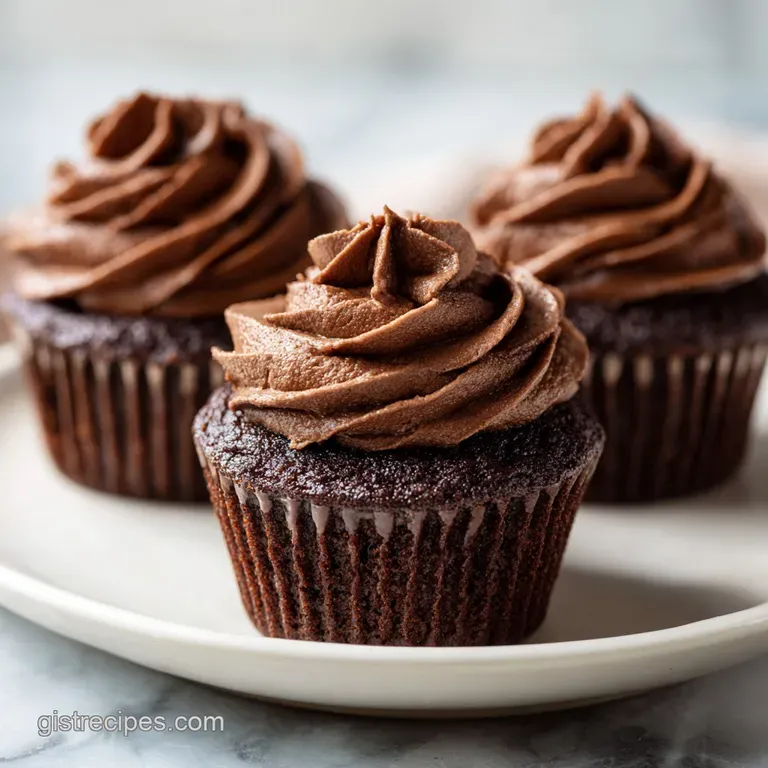
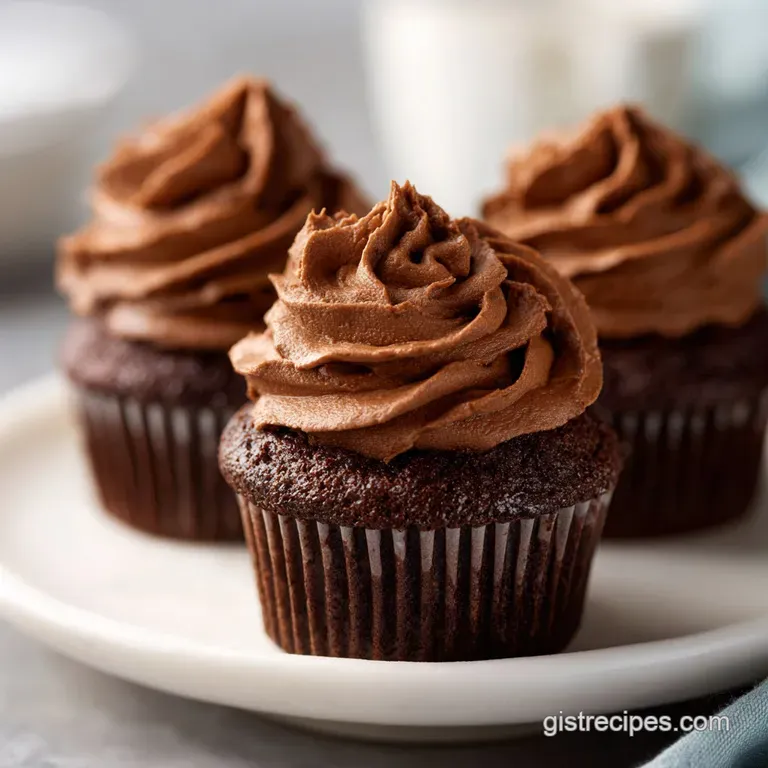
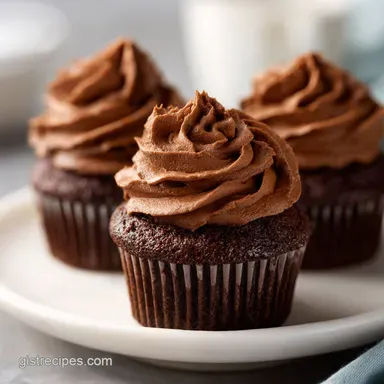
Peanut Butter Chocolate Cupcakes Recipe
- Time: Active 25 minutes, Passive 20 minutes, Total 45 minutes
- Flavor/Texture Hook: A velvety crumb meets a molten, salty sweet core and a silky, buttery finish.
- Perfect for: Family celebrations, cozy weekend baking, or a decadent treat for your favorite neighbors.
- The Physics of the Cocoa Bloom
- Ingredient Deep Dive for Flavor Success
- Selecting the Finest Pantry Staples for the Ultimate Chocolate Cupcakes
- Essential Kitchen Tools to Master the Perfect Butter Chocolate Cupcakes
- A Step-by-Step Guide to Baking Velvety Peanut Butter Chocolate Cupcakes
- Avoiding Common Baking Mishaps for a Flawless Chocolate Finish
- Adapting the Recipe for Vegan or gluten-free Chocolate Cupcakes
- Maintaining the Moist Crumb of Your Peanut Butter Chocolate Treat
- Presentation Ideas to Showcase Your Gooey Peanut Butter Chocolate Cupcakes
- Debunking Kitchen Myths
- Recipe FAQs
- 📝 Recipe Card
I’ll never forget the rainy afternoon I finally cracked the code on this recipe. I was standing in my kitchen, frustrated because my previous batch felt like eating a dry sponge. The air smelled of burnt sugar and disappointment.
But then, I tried blooming the cocoa in boiling water and folding in full fat Greek yogurt, and suddenly, the batter transformed into a shimmering, dark ribbon of liquid gold. When that first tray came out of the oven, the aroma of toasted nuts and rich fudge filled every corner of the house, and I knew I’d found something special.
There is a specific kind of magic that happens when you bite through a soft, mahogany colored cake and hit that hidden pocket of salted peanut butter. It’s that sharp contrast between the bitter edge of the Dutch processed cocoa and the creamy, savory sweetness of the filling that keeps you coming back for "just one more." This isn't just another dessert; it’s a study in balance that reminds me of the treats my grandma used to make, where nothing was ever too sweet and everything was made with a little bit of heart.
Right then, let's get into why this specific method works so well. We aren't just throwing ingredients into a bowl and hoping for the best. We’re using a bit of kitchen chemistry to ensure that every single one of these Peanut Butter Chocolate Cupcakes comes out with a tender, moist crumb that stays fresh for days.
Trust me on this, once you try the "boiling water trick," you’ll never go back to basic stirring again.
The Physics of the Cocoa Bloom
- Hydration Boost: Boiling water dissolves the cocoa solids instantly, releasing trapped flavor compounds and ensuring a velvety mouthfeel without any chalky residue.
- Acid Base Harmony: The Greek yogurt provides the necessary acidity to react with the baking soda, creating tiny carbon dioxide bubbles that lift the dense chocolate batter.
- Emulsion Stability: Using a neutral oil instead of butter keeps the cake moist even when cold, as oil remains liquid at room temperature while butter solids firm up.
- Protein Structure: The single large egg provides just enough structure to hold the gooey peanut butter center in place without making the cake tough or bread like.
| Method | Time | Texture | Best For |
|---|---|---|---|
| Standard Oven | 20 mins | Even rise, soft crumb | Classic cupcake texture |
| Convection | 17 mins | Crispy edges, deep dome | Bakery style appearance |
| Toaster Oven | 22 mins | Dense, fudgy base | Small batches (6 count) |
If you love the combo of chocolate and peanut butter but want something even easier, you have to try my Peanut Butter Cup recipe which literally takes minutes to prep. It uses a similar flavor profile but in a much more laid back, "toss it-in" format that’s perfect for busy weeknights when you still need a comfort food fix.
Ingredient Deep Dive for Flavor Success
| Component | Science Role | Pro Secret |
|---|---|---|
| Dutch Process Cocoa | Reduced acidity | Sift it twice to prevent tiny "flour bombs" in your batter |
| Full fat Greek Yogurt | Fat and moisture | Always use room temperature to prevent the batter from curdling |
| Boiling Water | Flavor extraction | Use filtered water to ensure the chocolate notes stay clean |
| Baking Soda | Chemical leavening | Ensure it’s less than 6 months old for a proper, airy rise |
For those days when it's too hot to turn on the oven, this NoBake German Chocolate Cheesecake recipe satisfies that rich cocoa craving without the heat. It has that same sophisticated chocolate depth but with a much silkier, chilled finish that pairs beautifully with a cup of coffee.
Selecting the Finest Pantry Staples for the Ultimate Chocolate Cupcakes
- 125g all purpose flour: The foundation of our structure. Why this? Provides enough protein for a sturdy dome without being heavy.
- 150g granulated cane sugar: For sweetness and moisture retention.
- 45g Dutch processed cocoa powder: Essential for that dark color. Why this? It’s alkalized, making it smoother and richer than natural cocoa.
- 1 tsp baking soda: Our primary lift agent.
- 0.5 tsp sea salt: To sharpen the chocolate and peanut butter notes.
- 1 large egg (room temp): Binds everything together.
- 120ml full fat Greek yogurt: The secret to a moist, tangy crumb.
- 60ml neutral oil (Avocado or Grapeseed): Keeps the cake tender for days.
- 120ml boiling water: To bloom the cocoa and melt the sugars.
- 60g creamy peanut butter (filling): Use a processed brand (like Jif) for stability.
- 15g maple syrup: Adds a hint of caramel to the center.
- 180g creamy peanut butter (frosting): The star of the whipped topping.
- 115g unsalted butter (65°F): The base for our velvety frosting.
- 120g powdered sugar (sifted): Provides structure and sweetness to the peak.
- 1 tsp pure vanilla extract: Rounds out the salty sweet profile.
- 2 tbsp whole milk: To adjust the frosting to a spreadable consistency.
| Original Ingredient | Substitute | Why It Works |
|---|---|---|
| Greek Yogurt | Sour Cream | Similar fat/acid content; produces a very rich, tender crumb. |
| Avocado Oil | Melted Coconut Oil | Adds a subtle tropical note; cake will be firmer when chilled. |
| Maple Syrup | Honey | Similar viscosity. Note: Honey has a stronger floral flavor profile. |
| Dutch Cocoa | Natural Cocoa | Use 1/2 tsp baking powder + 1/2 tsp soda to compensate for acidity. |
Essential Kitchen Tools to Master the Perfect Butter Chocolate Cupcakes
To get that velvety finish on your Peanut Butter Chocolate Cupcakes, a few specific tools really make a difference. First, I highly recommend using a digital kitchen scale. Measuring by weight (grams) instead of volume (cups) is the only way to ensure your 125g of flour isn't actually 150g, which would turn your cupcakes into chocolate bricks.
You'll also need a standard 12 cup muffin tin and high-quality paper liners. For the frosting, a stand mixer with a paddle attachment is your best friend. It beats the peanut butter and butter together into a pale, airy cloud that you just can't achieve by hand.
If you're feeling fancy, a piping bag with a large round tip will give you those professional looking swirls, but a simple offset spatula works perfectly for a homey, rustic look.
Don't forget a small cookie scoop (about 1 tablespoon size) for the filling. It makes plopping that gooey peanut butter center into the batter so much cleaner. And finally, a fine mesh sieve is non negotiable for sifting your powdered sugar; nobody wants "polka dot" frosting with lumps of sugar hidden inside.
A step-by-step Guide to Baking Velvety Peanut Butter Chocolate Cupcakes
Phase 1: Creating the Dutch Process Batter
- Preheat your oven to 350°F (180°C) and line your muffin tin.
- Whisk together 125g flour, 150g sugar, 45g cocoa, 1 tsp baking soda, and 0.5 tsp salt in a large bowl.
- Add the 1 large egg, 120ml Greek yogurt, and 60ml oil to the dry ingredients.
- Whisk until a thick, somewhat chunky paste forms. Note: Don't worry if it looks too thick right now; the water will fix it.
- Carefully pour in 120ml boiling water.
- Whisk slowly until the batter is thin, shimmering, and completely smooth.
Phase 2: The Hidden Gooey Center
- In a small bowl, stir together 60g creamy peanut butter, 15g maple syrup, and a pinch of salt.
- Fill each cupcake liner about 1/3 full with chocolate batter.
- Drop a small dollop (about 1 tsp) of the peanut butter mixture into the center.
- Top with the remaining chocolate batter until the liners are about 2/3 full.
Phase 3: Baking to Perfection
- Slide the tin into the center rack of the oven.
- Bake for 18 to 20 minutes until the tops spring back when lightly pressed.
- Let them cool in the pan for 5 minutes before moving to a wire rack. Note: Cooling in the pan briefly helps the structure set so they don't collapse.
Phase 4: Whipping the Salted Frosting
- Beat 115g softened butter and 180g peanut butter for 3 full minutes. Wait until the mixture turns pale gold and fluffy.
- Gradually add 120g sifted powdered sugar and 1 tsp vanilla.
- Add 2 tbsp milk, one at a time, until the frosting reaches a silky, pipeable consistency.
- Generously frost the cooled cupcakes and top with an extra pinch of flaky salt if you're feeling bold.
Avoiding Common Baking Mishaps for a Flawless Chocolate Finish
The most common mistake people make with this Peanut Butter Chocolate Cupcakes Recipe is overfilling the liners. Because this batter is quite thin due to the boiling water, it expands rapidly. If you fill them to the brim, they will spill over and create "mushroom tops" that stick to your pan.
Keep it to two thirds full, and you'll be rewarded with a beautiful, gentle dome.
Why Your Chocolate Cupcakes Sunk
If your cupcakes look like little craters after they cool, it usually means one of two things: either the oven door was opened too early, causing a sudden temperature drop, or the baking soda was expired. When the structure hasn't set yet, that puff of air escapes, and the cake collapses.
Always wait until at least the 15 minute mark before peeking!
| Problem | Root Cause | Solution |
|---|---|---|
| Grainy Frosting | Un sifted powdered sugar | Always sift sugar through a fine mesh sieve before adding to butter. |
| Dry, Crumbly Cake | Overbaking | Check doneness 2 minutes early; internal temp should be 205°F (96°C). |
| Filling Sank to Bottom | Batter too thin | Ensure your Greek yogurt is full fat and thick to support the PB dollop. |
Common Mistakes Checklist
- ✓ Always use room temperature eggs to ensure proper emulsification.
- ✓ Sift your cocoa powder to avoid bitter lumps in the finished cake.
- ✓ Don't skip the boiling water - it’s what "blooms" the chocolate flavor.
- ✓ Let the cupcakes cool COMPLETELY before frosting, or the butter will melt into a puddle.
- ✓ Use a kitchen scale for the 125g of flour to avoid a dense, heavy texture.
Adapting the Recipe for Vegan or gluten-free Chocolate Cupcakes
If you're looking for a Vegan Peanut Butter Chocolate Cupcakes version, you can swap the egg for a "flax egg" (1 tbsp ground flax mixed with 3 tbsp water) and use a dairy-free soy yogurt. For the frosting, a high-quality vegan butter stick and additional peanut butter will do the trick perfectly.
The texture will be slightly denser, but the flavor remains top tier.
For those needing a gluten-free option, a 1 to-1 gluten-free flour blend works surprisingly well here because the Greek yogurt provides so much moisture. Just make sure your blend contains xanthan gum to help hold that precious peanut butter filling in place.
If you're in a massive rush, you can even adapt a Peanut Butter Chocolate Cupcakes from Cake Mix by adding a dollop of Greek yogurt and a splash of vanilla to the box instructions to give it that homemade "from scratch" feel.
Maintaining the Moist Crumb of Your Peanut Butter Chocolate Treat
Because of the oil and the Greek yogurt, these cupcakes stay moist longer than your average butter based cake. You can keep them in an airtight container at room temperature for up to 2 days.
If you live in a very warm climate, I’d suggest the fridge, but let them sit out for 20 minutes before eating so the frosting softens back up to that velvety texture.
For long term storage, these freeze beautifully! I recommend freezing the unfrosted cakes. Wrap each one tightly in plastic wrap and then place them in a freezer bag for up to 3 months. When the craving hits, just thaw at room temperature and whip up a fresh batch of peanut butter frosting.
To use up any leftover frosting, it makes an incredible dip for apple slices or a spread for graham crackers zero waste and 100% joy.
Presentation Ideas to Showcase Your Gooey Peanut Butter Chocolate Cupcakes
When it comes to serving, I love leaning into the "salty sweet" vibe. A tiny sprinkle of flaky sea salt on top of the frosting not only looks professional but also cuts through the richness of the peanut butter.
If you want to go all out for a party, you could even top each one with a mini peanut butter cup or a drizzle of melted dark chocolate.
If you’re hosting a larger crowd and need more variety, these cupcakes pair wonderfully with my Strawberry Shortcake Cheesecake recipe. The bright, tart strawberries offer a lovely palate cleanser between the heavy, fudgy bites of chocolate and peanut butter. It creates a dessert spread that feels balanced and thoughtful, just like a grandma’s Sunday spread.
Debunking Kitchen Myths
A lot of people think that "natural" peanut butter (the kind you have to stir) is better for baking. Actually, for this specific recipe, the stabilized, creamy brands work better because they don't separate under the heat of the oven.
The oils in natural peanut butter can leak out, making the bottom of your cupcake greasy.
Another myth is that you can't use boiling water in a batter with eggs. As long as you've already mixed the egg with the yogurt and oil, the "thermal mass" of the batter will protect the egg from scrambling. The result is a much smoother crumb that feels like it came from a high end bakery.
Finally,, don't believe that more sugar equals a better cake; it's the salt in this recipe that actually makes the chocolate taste "more like chocolate." Enjoy the process, and happy baking!

Recipe FAQs
Can I substitute a natural, unstirred peanut butter for the filling?
No, use a stabilized creamy brand for the filling. Natural peanut butter separates when heated, which can cause the filling to leak oil into the delicate cupcake structure.
Is it true that adding boiling water makes the cake dry?
No, boiling water is essential for the texture. It "blooms" the cocoa, dissolving the solids completely, which results in a richer color and an intensely moist, velvety crumb.
How to store leftover frosted cupcakes to maintain moisture?
Place them in an airtight container at room temperature for up to two days. If the climate is hot, the refrigerator works, but allow them 20 minutes on the counter before serving so the frosting softens.
How to ensure the peanut butter filling stays suspended in the batter?
Fill the liner only two-thirds full with the chocolate batter. This ensures the batter surrounding the peanut butter core is thick enough to support the filling during the initial rise in the oven.
Can I make the frosting ahead of time without it getting too hard?
Yes, but only refrigerate the butter and peanut butter base. Do not add the powdered sugar until ready to frost, or the final product will stiffen significantly.
What if I don't have Greek yogurt available for the batter?
Use sour cream as a direct substitute for richness and tang. If you enjoyed the technique of balancing fat and acid here, see how we use acid to develop flavor in our Mashed Sweet Potatoes recipe.
Why are my cupcakes collapsing after they come out of the oven?
The structure likely set prematurely before the leavening finished its work. Avoid opening the oven door before the 15-minute mark, as a sudden temperature drop causes the unbaked structure to deflate.
Peanut Butter Chocolate Cupcakes
Ingredients:
Instructions:
Nutrition Facts:
| Calories | 381 kcal |
|---|---|
| Protein | 7.8 g |
| Fat | 23.8 g |
| Carbs | 38.0 g |
| Fiber | 2.1 g |
| Sugar | 23.8 g |
| Sodium | 315 mg |
