Ricotta Stuffed Shells: Creamy and Comforting
- Time: Active 20 minutes, Passive 30 minutes, Total 50 minutes
- Flavor/Texture Hook: Molten mozzarella topping over a dense, herb flecked creamy center
- Perfect for: Cozy Sunday family dinners or preparing a freezer friendly meal for a friend
- Creating the Most Comforting Ricotta Stuffed Shells
- Why These Layers of Flavor Actually Work
- Essential Timing and Precision for the Best Results
- Selecting Quality Ingredients for a Hearty Family Dinner
- The Only Tools Needed for a Seamless Bake
- Step-by-Step Assembly for Velvety Stuffed Pasta
- Solving Common Texture and Moisture Issues
- Simple Ways to Customize Your Cheese Filling
- Proper Storage and Freezing for Make-Ahead Meals
- Perfect Pairings for a Complete Sunday Spread
- Debunking Baked Pasta Myths
- Very High in Sodium
- Recipe FAQs
- 📝 Recipe Card
Creating the Most Comforting Ricotta Stuffed Shells
The kitchen is quiet, except for the soft bubbling of red sauce and the occasional clink of a spoon against a ceramic bowl. I remember the first time I tried making Ricotta Stuffed Shells for a big family gathering. I was so rushed that I skipped the most important part straining the cheese.
By the time I pulled the tray out of the oven, the shells were swimming in a watery puddle, and the beautiful filling had lost all its integrity. It was a lesson in patience that I’ve never forgotten.
Now, whenever I smell garlic hitting a warm pan or catch the earthy scent of fresh parsley being chopped, I’m transported back to that kitchen. This dish isn't about being trendy or fast; it’s about the layers of flavor that build as the pasta bakes in the sauce.
It’s the kind of meal that makes everyone at the table go silent for a few minutes while they just enjoy the hearty, cheesy goodness. We’re looking for that perfect balance where the pasta is tender but holds its shape, and the cheese is rich without being greasy.
In this guide, I’m sharing everything I’ve learned from those early mistakes. We’ll talk about why the fat content of your cheese matters and how a tiny pinch of a specific spice can change the entire profile of the dish.
Whether you’re a beginner or a seasoned home cook, these tips will help you achieve a velvety texture that stays exactly where it’s supposed to inside the shell. Trust me, once you master these small details, you'll never go back to a basic jar and box version again.
Why These Layers of Flavor Actually Work
The Physics of the Cheese Pull: Straining the ricotta removes excess whey, ensuring the filling remains dense and stable rather than weeping liquid during the over high heat baking process.
Protein Network Binding: The addition of a lightly beaten egg creates a structural matrix that sets as it heats, preventing the cheese from melting into a shapeless puddle.
Aromatic Infusion: Mincing garlic into a fine paste rather than chunks allows the sulfurous oils to distribute evenly through the fat rich ricotta, seasoning every bite.
Starch Hydration Control: Par boiling the shells just until they are flexible ensures they finish absorbing moisture from the marinara sauce, preventing a soggy bottom.
| Method | Prep Time | Texture Result | Best For |
|---|---|---|---|
| Fresh Prep | 20 minutes | Firm, distinct layers with a clean cheese flavor | Traditional family Sunday dinner |
| Shortcut (No Boil) | 10 minutes | Softer, more integrated texture; pasta is starchier | Hectic weeknights when time is tight |
| make-ahead/Frozen | 5 minutes | Ricotta becomes denser; sauce flavors deepen | New parents or meal prep Sundays |
Choosing between fresh preparation and shortcuts often comes down to the texture you prefer. While the shortcut method of using dry shells and extra sauce saves time, it often results in a dish that feels more like a casserole and less like individual stuffed pasta.
For a true family classic, the fresh prep method outlined here provides that "shatter" of baked cheese on top and a velvety interior that feels far more indulgent.
Essential Timing and Precision for the Best Results
The Dairy Deep Dive
The success of this recipe hinges on the quality of your dairy. Many people grab whatever is on sale, but for Ricotta Stuffed Shells, the fat content and moisture level are the primary drivers of success.
| Component | Science Role | Pro Secret |
|---|---|---|
| Whole Milk Ricotta | Provides the primary creamy bulk and moisture | Drain in cheesecloth for 30 minutes to ensure a thick, pipeable consistency |
| Large Egg | Acts as an emulsifier and structural binder | Beat it separately before folding into cheese to avoid over mixing the ricotta |
| Parmesan Cheese | Adds salty umami and reduces the overall pH | Use freshly grated "sands" rather than pre shredded to avoid anti caking starches |
| Mozzarella | Creates the iconic stretchy, molten topping | Use low moisture mozzarella for the top to get a golden brown crust without grease |
Chef Tip: If you have ten extra minutes, freeze your block of mozzarella before grating it. This prevents the cheese from clumping and ensures those beautiful, individual shreds that melt into a perfect, even blanket over your pasta.
Selecting Quality Ingredients for a Hearty Family Dinner
When you head to the store, look for the jumbo shells that aren't cracked in the box. I always buy two boxes just in case a few of them shatter during the boiling process it’s a small insurance policy for your sanity.
- 12 oz Jumbo Pasta Shells: These are the vessels for our filling. Why this? They provide the perfect surface area for holding a generous amount of cheese.
- 30 oz Whole Milk Ricotta Cheese: Make sure it is strained. Why this? Whole milk offers a much creamier mouthfeel than part skim varieties.
- 2 cups Shredded Mozzarella Cheese: Divided use for the filling and the topping.
- 1/2 cup Freshly Grated Parmesan or Pecorino Romano: Adds a necessary salty punch.
- 1 Large Egg: Lightly beaten to bind the filling together.
- 2 cloves Garlic: Mined into a paste to avoid biting into raw chunks.
- 1/4 cup Fresh Parsley: Finely chopped for a burst of color and freshness.
- 1/2 tsp Nutmeg: The secret ingredient in traditional Italian cheese fillings.
- 24 oz Marinara Sauce: Choose a high-quality brand or use a homemade batch.
- 1 cup Extra Mozzarella Cheese: Specifically for that golden top layer.
- Fresh Basil: For a fragrant garnish after baking.
| Original Ingredient | Substitute | Why It Works |
|---|---|---|
| Whole Milk Ricotta | Cottage Cheese (small curd, strained) | Similar protein structure. Note: Result will be saltier and slightly tangier |
| Jumbo Shells | Manicotti Tubes | Same pasta composition. Note: Requires a piping bag for efficient stuffing |
| Fresh Parsley | Dried Oregano (1 tbsp) | Provides herbal notes. Note: Lacks the brightness of fresh greens |
If you find yourself enjoying the process of layering flavors in this dish, you might also love the technique used in my High Protein Baked recipe, which uses similar cheese binding principles to create a satisfying crust.
The Only Tools Needed for a Seamless Bake
You don't need a professional kitchen to make this, but a few specific tools make the process much cleaner. A large 9x13 inch ceramic or glass baking dish is the standard. I prefer ceramic because it retains heat longer at the table, keeping the cheese molten while everyone goes back for seconds.
A large pot for boiling the shells is essential, as is a colander. For the filling, a medium sized mixing bowl and a sturdy spatula will do the trick. However, the real pro move is using a large piping bag or even a gallon sized Ziploc bag with the corner snipped off.
This allows you to fill the shells in seconds without tearing the delicate pasta or getting cheese all over your hands.
If you're looking for other ways to use your pasta pots, you might consider trying the Rasta Pasta Recipe for a completely different flavor profile that still utilizes that "al dente" boiling technique.
step-by-step Assembly for Velvety Stuffed Pasta

1. The Prep Phase
Boil the 12 oz jumbo shells in a large pot of water with 1 tbsp sea salt. Cook for 2 minutes less than the package instructions until they are pliable but still firm. Note: They will finish cooking in the oven as they absorb the sauce.
2. The Cooling Phase
Drain the shells and rinse them immediately with cold water. Stop the cooking process completely so they don't become mushy or stick together while you prep the filling.
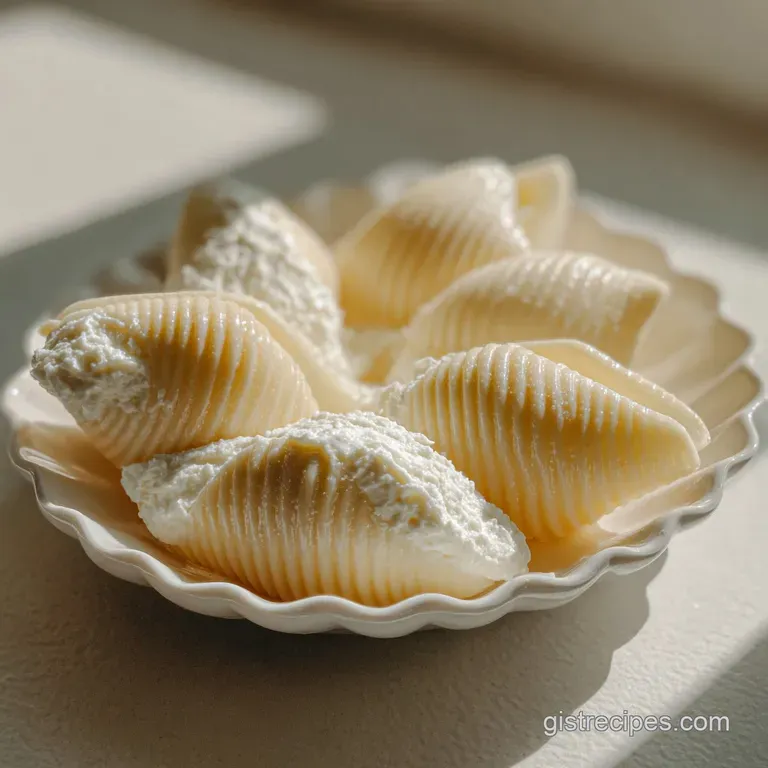
3. The Filling Fusion
In a medium bowl, combine the 30 oz strained ricotta, 2 cups mozzarella, 1/2 cup parmesan, the beaten egg, garlic paste, parsley, and nutmeg. Mix until just combined to keep the ricotta's light texture.
4. The Foundation
Spread about 1 cup of the 24 oz marinara sauce across the bottom of a 9x13 inch baking dish. Coat the entire surface to prevent the shells from sticking or burning on the bottom.
5. The Stuffing Technique
Gently open each shell and spoon in about 2 tablespoons of the ricotta mixture. Pack it firmly but gently to ensure there are no air pockets inside the shells.
6. The Assembly Phase
Place the stuffed shells in the baking dish in neat rows, nesting them closely together. Keep them snug so they support each other and stay upright during the bake.
7. The Final Topping
Pour the remaining marinara sauce over the shells, focusing on the edges. Sprinkle the extra 1 cup of mozzarella evenly across the top.
8. The First Bake
Cover the dish tightly with aluminum foil. Bake at 375°F for 20 minutes until the sauce is bubbling and the cheese inside is heated through.
9. The Finishing Touch
Remove the foil and bake for an additional 10 minutes until the top cheese is golden and crackling. This step develops the Maillard reaction for maximum flavor.
10. The Rest Period
Remove from the oven and let the dish sit for 5 minutes before serving. Allow the filling to set so it doesn't slide out of the shells when you lift them.
Solving Common Texture and Moisture Issues
Why Your Stuffed Shells Are Watery
This is the most frequent complaint with Ricotta Stuffed Shells. It usually stems from the ricotta itself. Grocery store ricotta is often packed with water or stabilizers. If you don't strain it, that water is released as the cheese heats up, turning your beautiful sauce into a soup.
Another culprit could be over boiling the pasta; the shells should be quite firm when they go into the oven so they can absorb the excess moisture from the sauce.
The Mystery of the Tearing Pasta
If your shells are shattering before you can even get the cheese inside, you likely overcooked them in the pot. Jumbo shells are thin and fragile. You want to pull them out the moment they are flexible enough to handle.
Also, make sure you aren't "crowding" the boiling pot; the shells need room to move without knocking into each other.
| Problem | Root Cause | Solution |
|---|---|---|
| Rubbery Cheese | Using pre shredded mozzarella | Grate your own cheese to avoid potato starch coatings |
| Bland Filling | Under seasoning or skipping nutmeg | Increase the garlic paste and ensure you use sea salt in the water |
| Dry Top Layer | Not enough sauce or baking uncovered | Ensure the sauce covers the pasta edges and use foil for the first 20 mins |
Common Mistakes Checklist:
- ✓ Strain the ricotta for at least 30 minutes to ensure a thick, creamy filling.
- ✓ Salt the pasta water heavily; it’s the only chance to season the shells themselves.
- ✓ Rinse shells in cold water immediately after boiling to prevent sticking.
- ✓ Use a piping bag for the filling to save time and prevent pasta breakage.
- ✓ Let the dish rest after baking to allow the proteins to firm up for easier serving.
Simple Ways to Customize Your Cheese Filling
If you’re catering to a crowd that loves their greens, making ricotta stuffed shells with spinach is as simple as squeezing all the moisture out of a bag of frozen spinach and folding it into your cheese mix.
The key word here is squeezing—spinach holds an incredible amount of water that will ruin your sauce if not removed.
For those who want something heartier, stuffed shells with meat are a classic variation. You can brown a pound of Italian sausage or ground beef and mix it directly into the marinara sauce before layering. This adds a savory depth that balances the richness of the cheese.
If you're looking for a white sauce version, replacing the marinara with a creamy bechamel creates ricotta stuffed shells alfredo sauce style, which is decadent and perfect for special occasions.
Proper Storage and Freezing for make-ahead Meals
One of the reasons I love this recipe is how well it behaves in the freezer. You can store the baked shells in the fridge for up to 4 days. They actually taste better on day two because the garlic and nutmeg have more time to meld with the dairy.
To reheat, I suggest doing it in the oven covered with foil to keep them from drying out.
To freeze, assemble the shells but do not bake them. Wrap the entire tray in a double layer of plastic wrap followed by aluminum foil. They will stay fresh for up to 3 months. When you’re ready to eat, you can bake them directly from frozen just add about 20 minutes to the covered baking time.
This is a life saver for those weeks when you know you won’t have time to cook from scratch.
To minimize waste, don't throw away the stems from your parsley or basil. Toss them into a freezer bag to use for making homemade vegetable or chicken stock later. Any leftover marinara can be frozen in ice cube trays for quick flavor boosts in future soups or stews.
Perfect Pairings for a Complete Sunday Spread
Since this dish is quite heavy and rich, you want to pair it with something that offers a crisp, acidic contrast. A simple arugula salad with a lemon vinaigrette is my go to. The peppery bite of the greens cuts right through the creamy ricotta.
If you're serving this for a larger gathering, a side of roasted broccoli or sautéed green beans with almonds provides a nice textural change. And of course, no Italian style dinner is complete without some crusty bread. A warm baguette or garlic knots are perfect for scooping up any stray bits of sauce and cheese left on the plate. If you want to keep the "stuffed" theme going but with a breakfast twist, check out my Pancake Tacos Ready recipe for a fun weekend brunch idea.
Debunking Baked Pasta Myths
Adding oil to the pasta water prevents sticking. This is a common myth that actually does more harm than good. Oil coats the pasta and prevents the sauce from adhering to the shells.
To prevent sticking, simply stir the shells occasionally during the first few minutes of boiling and rinse them with cold water once they are drained.
Ricotta stuffed shells are always vegetarian. While the base version is often meat free, traditional Italian recipes frequently use animal based rennet in the cheese or include meat in the sauce.
If you are serving strictly vegetarian guests, always check your cheese labels and stick to a purely tomato based marinara.
You must boil the pasta completely before stuffing. As we've discussed, this is the quickest way to end up with a mushy mess. The "par boil" technique is the industry standard for a reason; the pasta acts as a sponge in the oven, taking on the flavor of the sauce while reaching the perfect al dente texture.
 : PIN FOR LATER")
Very High in Sodium
1280 mg of sodium per serving (56% of daily value)
The American Heart Association recommends limiting sodium intake to no more than 2,300mg per day for most adults.
Sodium Reduction Tips for Stuffed Pasta Shells
-
Low-Sodium Cheese Swap-20%
Replace the shredded mozzarella cheese with a low-sodium or reduced sodium variety. This simple substitution can significantly reduce the sodium content without sacrificing flavor. Aim for cheeses with less than 100mg of sodium per serving.
-
Reduce Added Salt-15%
Omit the 1 tbsp of sea salt entirely or drastically reduce the amount. Taste the filling and sauce before adding any salt. Remember, the cheeses and marinara already contain sodium. Start with 1/4 tsp and adjust to taste.
-
Low-Sodium Marinara-15%
Use a low-sodium or no-salt added marinara sauce. Alternatively, make your own marinara sauce from scratch using fresh or canned (no salt added) tomatoes, herbs, and spices. Homemade sauce allows complete control over sodium levels.
-
Enhance with Herbs
Boost the flavor profile with fresh herbs like basil, oregano, and thyme. These can enhance the taste and reduce the need for added salt. Use at least 1/4 cup total herbs.
Recipe FAQs
What to put in ricotta cheese for stuffed shells?
Add parmesan, egg, garlic, nutmeg, and herbs. Mix these binders and flavor enhancers into your strained ricotta for a set, savory filling that holds its shape when baked.
Do you drain ricotta cheese for stuffed shells?
Yes, absolutely strain the ricotta. Excess whey in the cheese releases water during baking, resulting in a watery dish instead of a dense, creamy filling.
What are some common mistakes when making stuffed shells?
Overcooking the pasta, skipping the ricotta strain, and undersalting the water. These lead to mushy pasta, a watery filling, and bland overall flavor, respectively.
What's the best way to stuff pasta shells?
Use a piping bag or a Ziploc bag with the corner snipped. This allows for quick, clean filling without tearing the delicate, par-boiled shells.
Is it true that nutmeg is the secret ingredient for ricotta filling?
Yes, a small pinch of nutmeg transforms the flavor. It deepens the savory profile of the dairy and is a traditional addition in many classic Italian cheese preparations.
Should I boil the jumbo shells completely before stuffing?
No, boil them 2 minutes less than package directions. The shells need to finish cooking in the oven by absorbing moisture from the sauce, ensuring they aren't mushy.
Can I assemble the shells ahead of time before baking?
Yes, assemble them completely and refrigerate covered. They can be held in the refrigerator for up to 24 hours before baking, allowing the sauce flavors to meld.
Ricotta Stuffed Shells Classic
Ingredients:
Instructions:
Nutrition Facts:
| Calories | 734 kcal |
|---|---|
| Protein | 41.8 g |
| Fat | 36.5 g |
| Carbs | 55.9 g |
| Fiber | 4.2 g |
| Sugar | 8.8 g |
| Sodium | 1280 mg |
