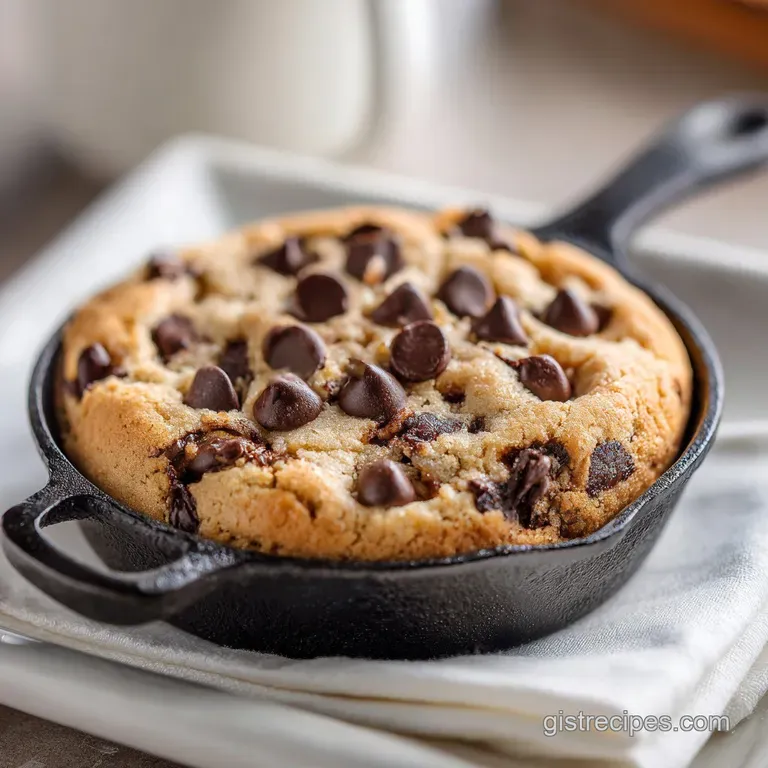
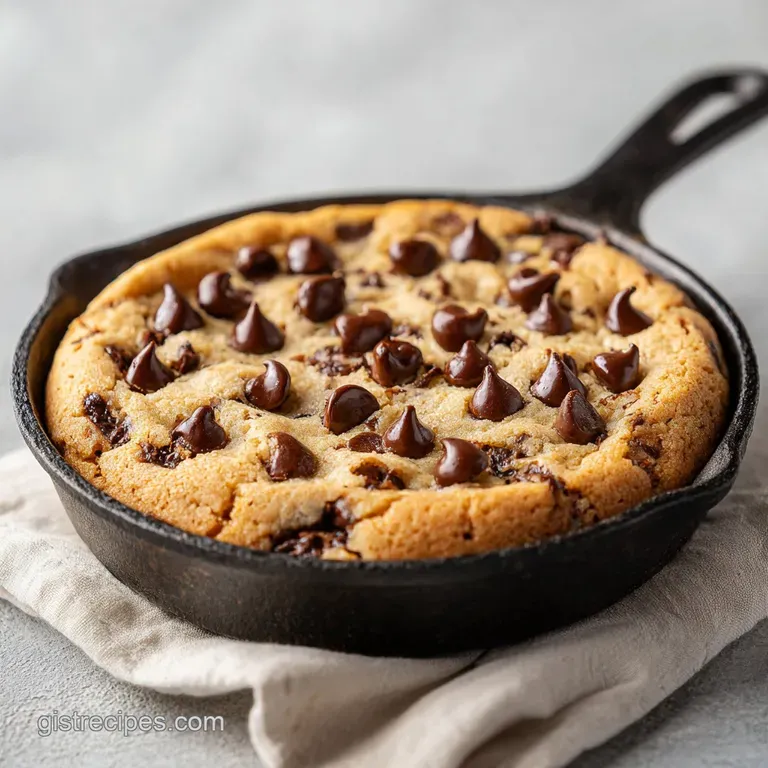
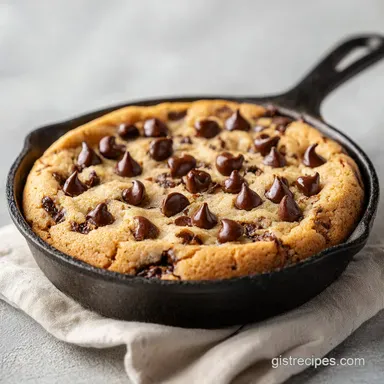
Skillet Chocolate Chip Cookie: Brown Butter Center
- Time: Active 10 minutes, Passive 25 minutes, Total 35 minutes
- Flavor/Texture Hook: Fudgy, brown butter center with crispy, caramelized edges
- Perfect for: Cozy family nights, effortless entertaining, or a last minute sugar craving
- Master the Ultimate Skillet Chocolate Chip Cookie
- The Science of the Skillet Bake
- Precision Measurements for Best Results
- Essential Ingredients for Fudgy Centers
- Choosing the Right Cast Iron Pan
- Step-by-Step Guide to Baking
- Fixing Common Skillet Cookie Problems
- Flavor Variations and Ingredient Substitutes
- Storing and Reheating Your Cookie
- Serving Your Cookie with Style
- Recipe FAQs
- 📝 Recipe Card
Master the Ultimate Skillet Chocolate Chip Cookie
The first time I heard the sizzle of butter hitting a hot cast iron skillet, I knew my baking life was about to change. I used to be the person who meticulously scooped thirty individual balls of dough onto parchment paper, only to have them merge into one giant, blobby mess in the oven.
It was frustrating, and honestly, cleaning those baking sheets was the worst part of my Sunday. Then, I saw my grandmother just press a whole batch of dough into her heavy seasoned pan, and the aroma that filled her kitchen was unlike anything I had ever smelled.
That scent of caramelizing sugar and toasted butter wafting from a heavy pan is something you never forget. When you pull a skillet chocolate chip cookie out of the oven, it isn't just a dessert, it is a centerpiece. The edges are dark and crackly, while the middle stays so gooey you almost need a spoon to eat it.
It’s the kind of treat that invites everyone to grab a fork and dig in right there at the table, which is exactly how family classics should be enjoyed.
The Science of the Skillet Bake
Thermal Mass Mastery: Cast iron retains heat significantly longer than aluminum, which creates a constant, even sear on the bottom and sides of the dough. This allows the edges to undergo the Maillard reaction more intensely, resulting in a deeper, toffee like flavor profile that thin pans simply cannot achieve.
For That Signature Toffee Depth
The secret to that "bakery style" flavor isn't an expensive extract; it is the interaction between the brown sugar and the heat of the pan. Because we use 3/4 cup packed brown sugar (150g) compared to just 1/4 cup granulated white sugar (50g), the molasses content is high.
When that molasses hits the pre warmed cast iron, it begins to caramelize instantly, creating a complex, smoky sweetness.
For a Molten, Gooey Core
Unlike individual cookies that lose moisture quickly from all sides, this large format protects the center. The 1 1/4 cups all purpose flour (155g) provides just enough structure to hold the 1 1/2 cups semi sweet chocolate chips (255g), but because the mass is so thick, the middle stays at a lower temperature for longer.
This prevents the proteins in the egg from fully tightening, keeping the texture velvety rather than cakey.
For Maximum Structural Integrity
The use of a single large egg at room temperature is non negotiable here. A cold egg would seize up the melted butter, leading to a lumpy dough that doesn't spread evenly. The room temperature egg emulsifies perfectly with the sugars and fats, creating a stable network that supports the heavy load of chocolate chunks without collapsing into a greasy puddle.
| Method | Time | Texture Outcome | Best For |
|---|---|---|---|
| Cast Iron Skillet | 25 mins | Shatter crisp edges, molten center | Serving warm with ice cream |
| Stainless Steel Pan | 22 mins | Even browning, slightly drier edge | A more traditional cookie feel |
| Cake Pan (9 inch) | 28 mins | Soft, uniform, cake like crumb | Slicing into clean wedges |
Choosing the right method depends on how much you value that contrast between the crunch and the goo. For me, nothing beats the cast iron. If you find yourself wanting a different texture entirely for breakfast, you might enjoy the fluffy shells in my Pancake Tacos Ready recipe.
Precision Measurements for Best Results
When we talk about grandma’s kitchen, we often think of "handfuls" and "pinches," but the best way to honor those classics is through precision. To get that silky dough and the perfect rise, you need to understand how each component reacts under the pressure of a hot skillet.
| Component | Science Role | Pro Secret |
|---|---|---|
| Unsalted Butter | Fat & Flavor | Brown it in the skillet first to add a nutty aroma and reduce water content. |
| Brown Sugar | Moisture & Color | Pack it tightly to ensure the molasses content creates that chewy, fudgy bite. |
| Baking Soda | Leavening & Browning | It reacts with the acidic brown sugar to create CO2 bubbles and speeds up browning. |
| Sea Salt | Flavor Contrast | A half teaspoon inside and a pinch on top cuts through the richness of the 255g of chocolate. |
Using the right tools is just as important as the ingredients themselves. I once tried making this in a thin non stick frying pan, and it was a disaster the bottom burned before the middle even thought about setting. If you've ever tried my Strawberry Shortcake Cheesecake recipe, you know that the pan material changes everything about the final bake.
Essential Ingredients for Fudgy Centers
To make this skillet chocolate chip cookie, you don't need a pantry full of trendy items. We are sticking to the hearty staples that have lived in kitchen cupboards for generations. Each ingredient here has a job to do, and skipping one or swapping it haphazardly can change the "soul" of the dish.
- 1/2 cup unsalted butter (113g): Use high-quality butter if you can. Why this? It provides the fat needed for that signature melt in-your mouth texture.
- 3/4 cup packed brown sugar (150g): Dark or light both work, but dark adds more caramel notes. Why this? High moisture content makes the cookie chewy instead of crispy.
- 1/4 cup granulated white sugar (50g): Standard table sugar. Why this? This is what gives you those irresistibly crispy, crackly edges.
- 1 large egg (50g): Must be at room temperature. Why this? It binds the fats and liquids into a smooth, velvety emulsion.
- 1 tablespoon vanilla extract (13g): Don't skimp on the good stuff. Why this? It acts as a bridge, bringing the chocolate and butter flavors together.
- 1 1/4 cups all purpose flour (155g): Sifted or fluffed before measuring. Why this? Provides the structural framework for the entire cookie cake.
- 1/2 teaspoon baking soda: Freshness matters here. Why this? Gives the cookie a slight lift so it isn't a leaden brick.
- 1/2 teaspoon sea salt: Fine grain for the dough. Why this? Essential for balancing the 43.8g of sugar per serving.
- 1 1/2 cups semi sweet chocolate chips (255g): Or chunks for bigger puddles. Why this? The star of the show; semi sweet provides the perfect cocoa balance.
Chef's Tip: Freeze your chocolate chips for 10 minutes before folding them into the warm dough. This prevents them from melting instantly and marbling the dough, giving you distinct "pockets" of chocolate instead.
Choosing the Right Cast Iron Pan
For this recipe, a 9 inch or 10 inch cast iron skillet is your best friend. A 10 inch pan will result in a slightly thinner, crispier cookie, while a 9 inch pan will give you that deep dish, ultra fudgy experience.
If you use a pan that isn't seasoned well, don't panic just give it a light coating of butter before pressing the dough in.
For the Skillet Base
The heavy bottom of a Lodge or similar cast iron pan is what creates that "crust" we are after. If you only have a stainless steel skillet, you can use it, but be aware that the heat will transfer faster, so you might need to shave 3 minutes off the bake time.
The Dry Fold Ins
When it comes to mixing, a simple wooden spoon or a sturdy spatula is all you need. We aren't looking to whip air into this dough like we would for a sponge cake. In fact, over mixing the flour will develop too much gluten, turning your tender cookie into something more like bread. Keep it gentle.
step-by-step Guide to Baking
- Preheat your oven to 350°F (180°C). Note: Starting with a fully hot oven ensures the edges set before the middle overcooks.
- Melt the 1/2 cup butter in your skillet over medium low heat.Note: Keep an eye on it until it begins to foam and smell like toasted hazelnuts.
- Remove from heat and stir in both sugars.Mix until the grainy texture starts to smooth out.
- Let the mixture cool for 5 minutes. Note: This prevents the egg from scrambling when you add it.
- Whisk in the room temperature egg and vanilla.Beat vigorously until the batter looks glossy and pale.
- Sift in the flour, baking soda, and sea salt.Note: Sifting prevents flour clumps in the finished bake.
- Fold the dry ingredients into the wet.Stop the moment you see no more white streaks of flour.
- Stir in 1 1/4 cups of the chocolate chips.Note: We save the remaining 1/4 cup for the very top.
- Spread the dough evenly across the pan.Press it down with a spatula until the surface is level.
- Top with the remaining chips and a pinch of flaky salt.Bake for 22-25 minutes until the edges are golden and the center still has a slight jiggle.
1. The Brown Butter Foundation
Browning the butter is the single most important step for flavor. You'll see it go from yellow to bubbly, then suddenly brown bits will appear at the bottom. This is where the "flavor layers" begin.
The toasted milk solids provide a savory backbone that makes the sugar taste more like caramel and less like plain sweetness.
2. The One Pan Mix
The beauty of this skillet chocolate chip cookie is that the pan is the bowl. By mixing everything in the skillet you just used to melt the butter, you're incorporating all those toasted bits back into the dough. It’s efficient and flavor focused.
3. Folding the Dough
When you add the 155g of flour, use a folding motion. Cut through the center and lift from the bottom. This keeps the dough tender. If you stir too aggressively, you'll end up with a tough, chewy texture that's more like a bagel than a cookie.
4. The Finishing Touch & Bake
The visual cue is everything. You want the edges to look "set" and slightly darker than the rest. The middle should look a bit underdone this is carryover cooking at work. As the pan sits on the counter, it will continue to cook that center to perfection without drying it out.
Fixing Common Skillet Cookie Problems
Even the most seasoned home cooks have off days. Maybe the oven was running hot, or maybe you forgot to let the butter cool. Understanding the "why" behind a kitchen fail is the fastest way to becoming a better baker.
For a Sinking Center
If your cookie looks like a crater, you might have over beaten the egg or used too much baking soda. When too much air is incorporated, the cookie rises rapidly and then collapses because it lacks the structural integrity to hold that height. Next time, just stir the egg until combined, don't whip it.
For a Greasy Texture
A greasy cookie usually happens when the butter was too hot when the flour was added, causing the fat to separate from the solids. It can also happen if the egg was too cold, preventing a proper emulsion.
| Problem | Root Cause | Solution |
|---|---|---|
| Burnt Bottom | Pan was too hot or rack too low | Place skillet on the middle rack and don't preheat the pan on the stove for too long. |
| Dry/Crumbly | Too much flour or overbaked | Measure flour by weight (155g) and pull the cookie out while the center is still wobbly. |
| Raw Middle | Oven temp too high | Lower oven to 325°F (160°C) and bake for 5-7 mins longer to allow even heat penetration. |
To Prevent a Dry Cookie
Check your oven temperature with an external thermometer. Most ovens are off by 10-25 degrees. If your oven runs hot, your 25 minute bake time might actually be 18 minutes. Always start checking at the 20 minute mark to be safe.
- ✓ Always use room temperature eggs to ensure a smooth emulsion.
- ✓ Don't over mix once the flour is added; stop as soon as it's incorporated.
- ✓ Use a kitchen scale for the flour (155g) to avoid "packing" the measuring cup.
- ✓ Let the cookie rest in the pan for at least 10 minutes before serving.
- ✓ Pat the brown sugar down firmly when measuring by volume.
Flavor Variations and Ingredient Substitutes
While I’m a purist when it comes to family classics, sometimes the pantry is bare or you just want to shake things up. This dough is incredibly resilient and handles swaps surprisingly well.
| Original Ingredient | Substitute | Why It Works |
|---|---|---|
| Unsalted Butter | Salted Butter | Works perfectly; just omit the 1/2 tsp of sea salt from the dough. |
| Brown Sugar | Coconut Sugar | Similar moisture levels. Note: Adds a subtle earthy/nutty flavor. |
| Semi Sweet Chips | Chopped Dark Chocolate | Higher cocoa content. Note: Results in a less sweet, more "adult" dessert. |
If you are looking for a more tropical vibe, you could even swap the vanilla for almond extract, but be careful it’s much stronger! For another decadent treat that uses some of these same pantry staples, you might want to try my Peanut Butter Chocolate recipe.
For a Salted Caramel Vibe
To get that trendy salted caramel flavor without the extra work, use dark brown sugar and double the vanilla. The extra molasses in the dark brown sugar mimics the deep notes of burnt sugar, and a heavy hand with the flaky sea salt on top seals the deal.
For a Vegan Friendly Version
You can swap the butter for a high fat vegan buttery stick and the egg for a flax egg (1 tbsp ground flax mixed with 3 tbsp water). The texture will be slightly denser and won't have the same "shatter" on the edges, but it still makes for a very satisfying skillet treat.
Storing and Reheating Your Cookie
Believe it or not, this skillet chocolate chip cookie tastes even better the next day. The flavors have time to meld, and the moisture from the chocolate chips softens the crumb slightly.
Storage: Keep any leftovers in the skillet covered tightly with foil or plastic wrap at room temperature for up to 3 days. If you manage to keep it longer than that, move it to the fridge for up to a week.
Freezing: You can freeze the baked cookie! Slice it into wedges, wrap each wedge in plastic wrap, and store them in a freezer bag for up to 3 months. It’s like having a gourmet "emergency" snack ready at all times.
Zero Waste Tip: If the edges get a bit too crunchy or dry after a few days, crumble the leftovers over vanilla bean ice cream or blend them into a milkshake. The caramelized bits add an incredible texture to a cold treat.
You can also use any leftover chocolate chips to top a batch of pancakes or stir them into oatmeal.
Serving Your Cookie with Style
Presentation is half the fun with a cast iron dessert. There is something so rustic and inviting about bringing the warm pan directly to the table. It signals that the meal isn't just over; it’s celebrating.
For Restaurant Quality Visuals
The "pro" move is to add a massive scoop of high-quality vanilla bean ice cream right in the center while the cookie is still warm. As the ice cream melts, it creates a velvety sauce that seeps into the nooks and crannies of the cookie.
For Individual Servings
If you have mini 3 inch or 5 inch cast iron skillets, you can divide this dough into smaller portions. A 5 inch skillet usually takes about 12-15 minutes to bake. It makes everyone feel special to have their own "personal" pizza style cookie.
Precision Checkpoints
- 1. The 5 Minute Foam
- When melting the butter, ensure you see the foam subside and the brown bits appear. This is your first layer of flavor.
- 2. The Glossy Sheen
- After adding the egg and sugar, the batter should look like shiny satin. This means your emulsion is perfect.
- 3. The 22 Minute Jiggle
- When you gently shake the pan at 22 minutes, the center should move slightly, like Jell O. If it’s stiff, it’s overbaked.
There you have it the only skillet chocolate chip cookie recipe you’ll ever need. It’s hearty, comforting, and brings that "grandma’s kitchen" feeling to any modern home. Grab your cast iron, get that butter browning, and enjoy the sizzle!
Debunking Kitchen Myths
Myth: You must cream cold butter and sugar to get a good cookie. Truth: While creaming adds air for light, cakey cookies, using melted (or browned) butter creates a denser, fudgier, and more flavorful "chew" that is preferred for skillet bakes.
Myth: Cast iron will make your cookie taste like onions or garlic. Truth: As long as your skillet is well seasoned and cleaned properly (warm water, no harsh soaking), the "patina" of the pan only adds to the non stick surface and doesn't transfer savory flavors to your sweets.
Myth: You have to use "bread flour" for a chewy cookie. Truth: All purpose flour is the gold standard for this recipe because it provides the perfect balance of protein. Bread flour can make a skillet cookie too tough and "bready."

Recipe FAQs
Can you bake cookies in a skillet?
Yes, it is the superior method for texture contrast. The heavy cast iron provides massive thermal retention, which sears the edges to a crisp while insulating the center, ensuring it stays molten.
What makes a skillet cookie unique compared to standard drop cookies?
The texture contrast is unparalleled. A skillet cookie develops a deeply caramelized, shatteringly crisp edge due to direct, sustained heat transfer from the pan bottom, while the large mass keeps the core underbaked and gooey.
What is another name for a skillet cookie?
It is often called a Pizookie, which is a mashup of pizza and cookie. This name perfectly describes its large, shareable, sliceable format, much like a thick crust dessert pizza.
What is Snoop Dogg's cookie recipe often referenced alongside this style?
Snoop Dogg's widely known recipe often involves adding a unique twist, like using frosting or specific extracts. While the base technique remains similar to this cast iron method, his versions frequently emphasize extra decadent toppings or unusual flavor pairings.
How do I prevent the bottom of my skillet cookie from burning?
Place the skillet on the middle oven rack, not the lowest one. The direct heat from the bottom element is too intense; using the middle rack allows the ambient oven heat to cook the top alongside the bottom.
How do I ensure the center of the cookie is gooey and not cakey?
Pull the cookie from the oven when the edges are set but the middle still jiggles like Jell-O. This carryover cooking, facilitated by the hot cast iron, finishes the center gently, similar to the way residual heat perfects a roast chicken; apply this temperature precision to our Rosca de Reyes Recipe for similar controlled results.
Is it true that I can use any size skillet for this recipe?
No, stick to 9 or 10 inches for best results, depending on your desired thickness. A larger pan, like a 12 inch, will result in a very thin cookie that may overbake too quickly before the center sets properly.
Skillet Chocolate Chip Cookie
Ingredients:
Instructions:
Nutrition Facts:
| Calories | 434 kcal |
|---|---|
| Protein | 4.3 g |
| Fat | 21.7 g |
| Carbs | 60.1 g |
| Fiber | 2.6 g |
| Sugar | 43.8 g |
| Sodium | 248 mg |
