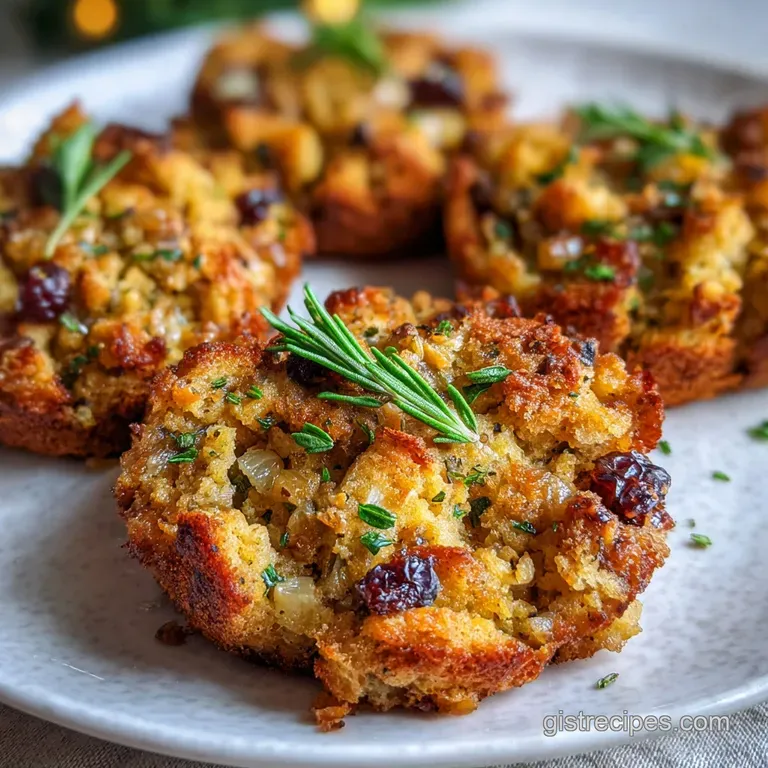
Stuffing Balls Recipe: Crispy Baked

- Time: Active 20 mins, Passive 25 mins, Total 45 mins
- Flavor/Texture Hook: Shattering crisp exterior with a velvety, sausage flecked center.
- Perfect for: Holiday gatherings, game day appetizers, or Sunday roasts.
- Creating the Ultimate Sage Stuffing Balls Recipe
- The Science Behind the Texture
- Component Analysis for Peak Flavor
- Vital Elements for Your Kitchen
- Step by Step Kitchen Guide
- Solving Common Textural Mishaps
- Versatile Flavor Variations
- Adjusting the Batch Size
- Debunking Common Kitchen Myths
- Storing Your Leftover Batches
- Perfect Holiday Table Pairings
- Recipe FAQs
- 📝 Recipe Card
Creating the Ultimate Sage Stuffing Balls Recipe
Right then, let's talk about that specific sound the sizzle of ground sausage hitting a hot pan. I remember the first time I tried to make a stuffing balls recipe; I was so excited to impress my family, but I used fresh, soft bread right out of the bag.
The result was a tray of sad, grey mush that looked more like damp sponges than the golden treasures I'd imagined. It was a total disaster, but it taught me the most important lesson in stuffing history: moisture is the enemy of the crunch.
Now, every time I start this recipe, the aroma of fresh sage and thyme hitting the melting butter instantly transports me back to my grandmother's kitchen. There's something so comforting about the way the onions and celery soften and turn translucent, smelling like every happy holiday memory you've ever had.
We aren't just making a side dish here; we're creating little concentrated bursts of nostalgia that have a way of disappearing off the tray before they even hit the dinner table.
Trust me, once you master the balance of the bread and the broth, you'll never go back to the standard casserole style. This version is all about the contrast between that rugged, jagged crust and the herb infused, savory middle. It's hearty, it's honest, and it's exactly what home cooking should be.
We’re going to skip the trendy shortcuts and focus on what actually works: good bread, plenty of butter, and enough herbs to make the whole house smell like a dream.
The Science Behind the Texture
The Physics of the Crust: Starch retrogradation in the dried bread creates a sturdy crystalline structure that resists collapse when the broth is added. This ensures the balls maintain their shape while the high surface to volume ratio allows the oven's heat to dehydrate the exterior into a shatter bright crunch.
| Method | Time | Texture | Best For |
|---|---|---|---|
| Standard Oven | 25 minutes | Uniformly golden and crisp | Traditional holiday dinner |
| Air Fryer | 12 minutes | Extra shattering crisp crust | Quick weeknight snacks |
| Slow Cooker | 3 hours | Soft, pudding like center | Maximum moisture and ease |
The choice of cooking method really depends on how much you value that "shatter" factor. While the air fryer is brilliant for a quick fix, the oven provides that classic, deep roasted flavor that only comes from a steady, dry heat.
If you're hosting a big crowd, the oven is your best friend because you can fit all twenty servings on a single large baking sheet without overcrowding them.
Component Analysis for Peak Flavor
| Ingredient | Science Role | Pro Secret |
|---|---|---|
| Sourdough/Brioche Mix | Structural Integrity | Use 2 day old bread for better absorption. |
| Large Eggs | Protein Binding | Beat until frothy to incorporate air. |
| Turkey Bone Broth | Umami Hydration | Warm it first to jumpstart the fats. |
| Unsalted Butter | Fat Emulsification | Sauté aromatics until they just start to brown. |
When you're choosing your ingredients, remember that the bread is the soul of the dish. I like to use a mix because sourdough provides the "skeleton" that sturdy chew that keeps the balls from falling apart while the brioche adds a luxurious, fatty sweetness that feels incredibly indulgent.
Using turkey bone broth instead of plain water or cheap stock adds a layer of gelatinous depth that coats the bread cubes in a velvety richness.
Vital Elements for Your Kitchen
For this stuffing balls recipe, you’ll need 12 oz dried bread cubes, specifically a sourdough and brioche mix for the best texture. You'll also want 0.5 lb ground breakfast sausage honestly, don't even bother with the low-fat versions, as the fat is where all the flavor lives.
Grab 0.5 cup unsalted butter Why this? Allows total control over the salt levels. along with 1 large yellow onion and 3 stalks of celery, both finely diced.
For the herbs, we need 2 tbsp fresh sage, 1 tbsp fresh thyme, and 1 tsp poultry seasoning to really hit those traditional notes. To bind it all together, have 1.75 cups turkey bone broth (keep it warm!) and 2 large eggs Why this? Acts as the "glue" for a perfect sphere. ready to go.
Finally, don't forget 0.5 tsp sea salt and 0.5 tsp cracked black pepper to sharpen the savory profile.
step-by-step Kitchen Guide
The Savory Herb Base
- Brown the sausage. In a large skillet, cook 0.5 lb ground sausage over medium heat, breaking it into tiny crumbles until browned and sizzling. Note: Tiny crumbles ensure even distribution in every bite.
- Sauté the aromatics. Add 0.5 cup unsalted butter to the pan with 1 diced onion and 3 stalks of celery. Cook for 8 minutes until the onions are translucent and fragrant.
- Infuse the herbs. Stir in 2 tbsp fresh sage, 1 tbsp thyme, and 1 tsp poultry seasoning. Let them bloom in the fat for 2 minutes until the aroma fills the room.
The Hydration and Binding
- Combine the dry ingredients. Place 12 oz dried bread cubes in a massive bowl and toss with 0.5 tsp sea salt and 0.5 tsp black pepper.
- Add the savory mix. Pour the hot sausage and butter mixture over the bread. Toss gently until every cube is glistening with fat.
- Whisk the binders. In a separate jug, whisk 1.75 cups warm turkey bone broth with 2 large eggs.
- Hydrate the bread. Drizzle the liquid over the bread in three stages. Stir carefully until the liquid is fully absorbed but not mushy.
The Rolling and Roasting
- Shape the balls. Using a cookie scoop or your hands, form the mixture into 20 golf ball sized spheres. Note: Don't pack them too tightly or they'll be heavy.
- Prepare for heat. Place the balls on a parchment lined baking sheet, leaving an inch of space between each.
- Bake to perfection. Roast at 375°F (190°C) for 25 minutes until the tops are deeply golden and crispy.
Solving Common Textural Mishaps
Why Your Spheres Crumble
If your balls are falling apart before they even hit the oven, it's usually a hydration issue. Bread cubes can be surprisingly thirsty, and if they haven't sat for five minutes to really soak up that egg and broth mixture, the "glue" hasn't had time to set. Think of it like concrete it needs a moment to bond.
If they feel dry, add an extra splash of broth, one tablespoon at a time, until you can squeeze a handful and it holds its shape.
To Prevent Mealy Texture
A mealy or "sandy" texture often happens when the bread cubes are too small or the mixture is over mixed. You want to fold the ingredients together like you're making a delicate cake batter, not mash them like potatoes.
If you over work the bread, you break down those beautiful pores that are supposed to hold onto the savory fats and juices.
| Problem | Root Cause | Solution |
|---|---|---|
| Soggy bottom | Excess broth pooling | Use a wire rack on the baking sheet |
| Burnt herb bits | Heat too high | Tent with foil for the first 10 mins |
| Greasy texture | Butter not emulsified | Ensure broth is warm before adding to eggs |
Common Mistakes Checklist
- ✓ Never use fresh bread; always dry it out in a low oven first to prevent sogginess.
- ✓ Preheat your oven for at least 20 minutes to ensure an immediate "sear" on the crust.
- ✓ Don't skip the egg whisking; frothy eggs distribute much more evenly.
- ✓ Avoid packing the balls too tightly; a light touch keeps the center airy and tender.
- ✓ Let the mixture rest for 10 minutes before rolling to ensure total hydration.
Versatile Flavor Variations
If you want to move away from the traditional sage profile, you can easily pivot this recipe to match other cuisines. For instance, if you're serving a spicy main dish, you might consider how the savory notes here compare to the bold spices in a Rasta Pasta Recipe. You could swap the breakfast sausage for spicy chorizo and add a handful of chopped cilantro for a completely different vibe.
For a "Pioneer Woman" Style Richness
If you're after that ultra decadent, ranch style flavor, increase the butter by two tablespoons and use heavy cream for a quarter of the broth. It makes the center almost custard like, which is heavenly if you're serving these alongside a leaner meat like roasted turkey breast.
The Air Fryer Shortcut
When I'm in a rush, I skip the oven and pop these into the air fryer. Set it to 350°F and cook for 12 minutes, shaking the basket halfway through.
You get a much more aggressive crunch on the outside, which is perfect if you’re serving these as a standalone snack with a side of gravy for dipping.
Adjusting the Batch Size
Scaling Down (½ Batch): When making only 10 balls, use a smaller skillet for the aromatics to prevent the butter from burning. Use one large egg and reduce the cook time by about 5 minutes, as the smaller mass in the oven will heat up more quickly.
Scaling Up (2x-4x): If you're feeding a small army, double the sausage and bread, but only increase the poultry seasoning and salt by 1.5x. Spices can become overwhelming in large volumes.
You'll likely need to bake in batches or use two separate oven racks, rotating the pans halfway through to ensure even browning.
Debunking Common Kitchen Myths
One big misconception is that you have to use "stuffing bread" from a box. Honestly, the best stuffing balls come from the odd ends of loaves you’ve saved in the freezer. Another myth is that the sage flavor will "fade" if you sauté it too long.
In reality, sage is a hardy herb; its oils are fat soluble, meaning they actually get stronger and more pervasive the longer they hang out in that melting butter.
Storing Your Leftover Batches
Storage: These keep beautifully in the fridge for up to 4 days. Store them in an airtight container once they’ve cooled completely. To reheat, don't use the microwave unless you want them to turn into rubber.
A quick 10 minute blast in a 350°F oven will bring that "shatter" back to the crust.
Zero Waste: If you have leftover bread crusts or the "heels" of the loaf, don't toss them! Toss them in a food processor to make coarse crumbs, then freeze them. You can use these crumbs to coat the outside of your stuffing balls for even more texture, or use the leftover sausage fat to fry up some eggs the next morning.
It's all about using every scrap of flavor.
Perfect Holiday Table Pairings
These stuffing balls are essentially the ultimate wingman for any protein. While they are classic with turkey, they are absolutely "knock your socks off" good when served with a bold, zesty sauce. I love pairing them with a Cowboy Butter Chicken recipe because the garlic and lemon in the butter cut right through the rich, savory sausage in the stuffing.
If you're looking for a vegetable side that won't get lost next to these flavorful spheres, consider a bright, acidic salad or roasted Brussels sprouts with a balsamic glaze. The acidity is key here; since the stuffing is so rich in butter and sausage, you need something sharp to cleanse the palate between bites.
Whether it's a formal dinner or a casual Sunday meal, these little golden balls are always the first thing to disappear.

Recipe FAQs
What are some common stuffing ball mistakes?
Using fresh bread. Fresh bread releases too much moisture, leading to soggy, mushy stuffing balls instead of crispy ones. Always use dried out bread cubes for the best texture.
Do you put eggs in stuffing balls?
Yes. Eggs act as a binder, holding the mixture together so the balls maintain their shape during cooking. Whisking them until frothy also helps incorporate air for a lighter texture.
Why do my stuffing balls fall apart?
Insufficient hydration and binding time. If the bread hasn't fully absorbed the liquid and binders, the mixture won't hold together. Let the mixture rest for at least 5-10 minutes before shaping to allow everything to meld.
Can I make stuffing balls a day ahead?
Yes, you can shape them. You can form the stuffing balls the day before and store them in an airtight container in the refrigerator. Bake them just before serving to ensure maximum crispness.
How do I get stuffing balls extra crispy?
Dry out your bread and bake at a good temperature. Using dried bread cubes is crucial. Bake them at 375°F (190°C) for about 25 minutes, ensuring they have enough space on the baking sheet to allow heat circulation.
What kind of bread is best for stuffing balls?
A mix of sourdough and brioche. Sourdough provides structure and a slight tang, while brioche adds richness and a tender crumb. Day-old bread works best as it's already dried out.
How do I make my stuffing balls moist inside but crispy outside?
Balance hydration and a good bake. Use just enough warm broth to moisten the bread without making it mushy. The key is the initial drying of the bread and then baking at a sufficient temperature to crisp the exterior while the inside steams.
Stuffing Balls Recipe

Ingredients:
Instructions:
Nutrition Facts:
| Calories | 138 calories |
|---|---|
| Protein | 3.8 g |
| Fat | 8.9 g |
| Carbs | 10.2 g |
| Fiber | 0.7 g |
| Sugar | 1.1 g |
| Sodium | 145 mg |
