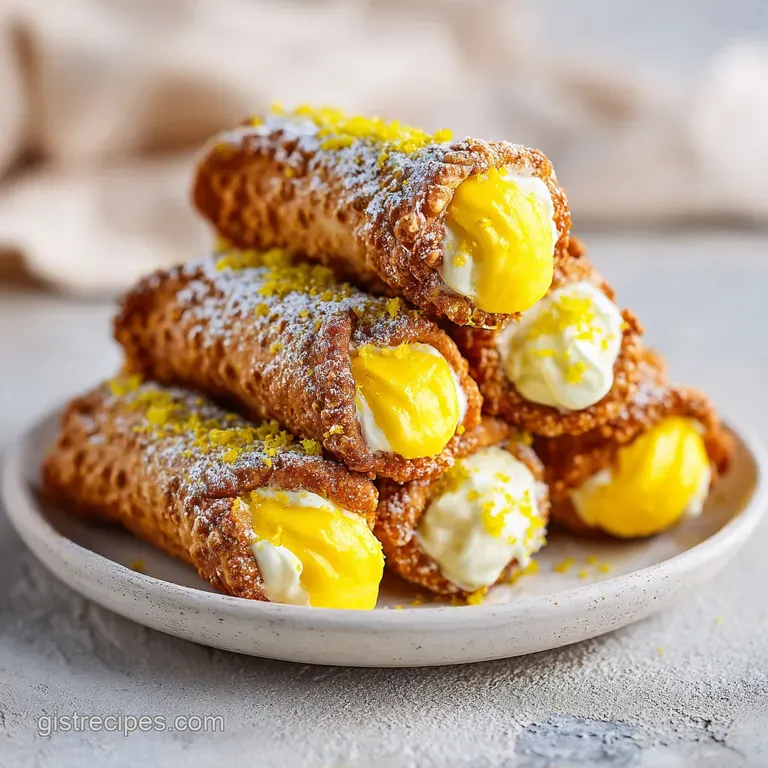
Lemon Meringue Pie Cannoli: Zesty and Crisp
- Time:20 minutes active + 10 minutes cook = 30 minutes total
- Flavor/Texture Hook: Shatter crisp shells with a velvety, tangy center and toasted peaks
- Perfect for: Stress free party treats or a bright summer dessert
- The Secrets Behind Lemon Pie Cannoli
- Essential Recipe Specs and Timing
- Gathering Your Fresh Ingredients
- Must Have Kitchen Equipment
- From Prep to Plate Steps
- Fixing Common Texture Mistakes
- Simple Variations and Substitutions
- Smart Storage and Preservation
- Best Pairings for This Treat
- Recipe FAQs
- 📝 Recipe Card
The smell of toasted sugar and fresh citrus is honestly one of the best things you can have in your kitchen. I remember the first time I tried making these for a family get together. I thought I was being helpful by filling the shells a few hours early so I could relax during the party. Big mistake.
By the time guests arrived, the shells had turned into soggy, limp tubes that felt like wet cardboard in my hand. It was a total disaster.
The trick I learned the hard way is all about the timing and the base of the filling. You cannot use a thin curd on its own, and you definitely cannot fill them in advance. This version uses a stabilized cream cheese base that holds its shape, ensuring your Lemon Pie Cannoli stays crisp until the very last bite.
It's a bright, zesty twist on a traditional favorite. We are combining the best parts of a lemon meringue pie with the crunch of a cannoli. Trust me, once you see those toasted meringue peaks, you'll never go back to the plain ricotta version.
The Secrets Behind Lemon Pie Cannoli
Right then, let's talk about why this actually works. Most people struggle with filling that leaks or shells that go soft. The secret is in how we build the cream.
Structural Anchor: The cream cheese provides a thick, fatty base that resists absorbing into the shell. It keeps the filling plump and prevents that dreaded sogginess.
Airy Lift: Folding in whipped heavy cream lightens the dense cheese. This creates a velvety texture that feels more like a mousse than a heavy spread.
Protein Stability: The cream of tartar works with the egg whites to create a stronger network of bubbles. This keeps your meringue peaks from collapsing or "weeping" before you can torch them.
Instant Caramelization: Using a torch instead of an oven allows you to brown the meringue in seconds. This prevents the shell from heating up or softening while you get that golden brown color.
| Method | Time | Texture | Best For |
|---|---|---|---|
| Kitchen Torch | 2 mins | Precise, crisp peaks | Small batches, fast finish |
| Oven Broiler | 3-5 mins | Even, wider brown | Large trays, consistent color |
| No Heat | 0 mins | Soft, snowy white | Kids' parties, no torch homes |
Essential Recipe Specs and Timing
When you're prepping these, keep your eye on the clock. Since this is mostly a no bake assembly project, the "cook" time is really just the time spent browning the meringue.
I've found that the biggest time sink is waiting for the cream cheese to soften. If you forget to take it out of the fridge, you'll end up with lumps that no amount of whisking can fix. Give yourself 20 minutes for the active prep, and you'll be golden.
Gathering Your Fresh Ingredients
For a stress free experience, get everything on your counter before you start. I prefer using full fat ingredients here because the fat is what carries the lemon flavor and keeps the texture silky.
- 8 oz cream cheese, softened Why this? Provides the necessary structure and stability
- 1/2 cup lemon curd Why this? Adds the concentrated citrus punch
- 1/4 cup powdered sugar Why this? Dissolves instantly for a smooth finish
- 1/2 cup heavy whipping cream, cold Why this? Adds lightness and a velvety feel
- 1 tsp lemon juice Why this? Brightens the heavy fats
- 1 tbsp lemon zest Why this? Essential oils provide the aroma
- 2 large egg whites, room temperature Why this? Base for the fluffy meringue
- 1/2 cup granulated sugar Why this? Stabilizes the egg white foam
- 1/4 tsp cream of tartar Why this? Prevents the meringue from collapsing
- 1 pinch salt Why this? Balances the sweetness
- 12 pre made cannoli shells Why this? Saves hours of frying and rolling
| Ingredient | Science Role | Pro Secret |
|---|---|---|
| Cream Cheese | Emulsifier/Base | Use a rubber spatula to ensure no lumps remain |
| Heavy Cream | Aeration | Keep it ice cold until the second you whip it |
| Egg Whites | Protein Structure | Ensure the bowl is grease free or they won't peak |
| Lemon Curd | Flavor Concentrator | Stir it well first to remove any separation |
Must Have Kitchen Equipment
You don't need a professional kitchen, but a few specific tools make this way easier. If you don't have a piping bag, you can use a sturdy Ziploc bag with the corner snipped off, but a real bag gives you much better control.
I highly recommend a star tip for the meringue. It creates those beautiful ridges that catch the heat from the torch, giving you a variegated golden brown look. Also, if you're using a hand mixer, make sure you have a clean bowl for the egg whites.
Even a tiny drop of yolk or oil will stop your meringue from reaching those stiff peaks.
From Prep to Plate Steps

Let's crack on with the assembly. Follow these steps closely to keep the textures exactly where they should be.
Phase 1: Whipping the Stabilized Filling
- Beat the softened cream cheese and powdered sugar. Continue until the mixture is completely smooth and lump freeNote: Lumps here will clog your piping tip.
- Fold in the lemon curd, lemon juice, and zest. Use a slow folding motion to keep the air in.
- In a separate chilled bowl, whip the heavy cream. Beat until stiff peaks form, meaning the cream stands straight up when you lift the whisk.
- Gently fold the whipped cream into the lemon mixture. Mix until a velvety, uniform consistency is achieved. Transfer the filling to a piping bag.
Phase 2: Creating the Toasted Meringue
- Whisk egg whites, cream of tartar, and salt. Beat until the mixture is frothy and bubbly.
- Gradually add granulated sugar. Beat on high speed until glossy, stiff peaks form. According to King Arthur Baking, the sugar must be fully dissolved to avoid a grainy texture.
- Transfer the meringue to a piping bag fitted with a star tip.
Phase 3: Final Assembly & Finishing
- Pipe the lemon cream cheese filling into both ends of each shell. Fill until the shell is plump but not overflowing.
- Pipe a small swirl of meringue on the exposed ends.
- Use a kitchen torch to lightly brown the meringue. Heat until toasted and golden brown, moving the flame constantly to avoid burning.
Chef Note: If you're making these for a crowd, pipe the filling and the meringue just before guests arrive. The shells are the most fragile part, and they will start to soften within an hour.
Fixing Common Texture Mistakes
Even with a good recipe, things can go sideways. Usually, it's a temperature issue. If your cream cheese wasn't soft enough, you'll see tiny white dots in your filling. If your egg whites had a bit of oil in the bowl, the meringue will stay liquidy.
Runny Filling Fixes
If your filling is too soft to stay in the shell, it's likely because the cream cheese was too warm or the heavy cream was over beaten. You can try folding in another tablespoon of powdered sugar to thicken it up, but usually, chilling the filling for 15 minutes is the best fix.
Weeping Meringue Issues
When you see little beads of syrup leaking from the meringue, that's called "weeping." This happens if the sugar wasn't fully incorporated or if the meringue sat too long before being torched. To prevent this, make the meringue immediately before you plan to pipe and torch it.
| Problem | Root Cause | Solution |
|---|---|---|
| Soggy Shells | Filled too early | Fill and serve within 30 mins |
| Lumpy Filling | Cold cream cheese | Beat cheese and sugar longer |
| Flat Meringue | Oil in the bowl | Wipe bowl with lemon juice first |
Common Mistakes Checklist
- ✓ Did you soften the cream cheese completely?
- ✓ Is the heavy cream ice cold before whipping?
- ✓ Did you avoid adding yolk to the egg whites?
- ✓ Did you fill the shells from both ends?
- ✓ Did you move the torch constantly to prevent burning?
Simple Variations and Substitutions
Depending on what you have in the pantry, you can tweak this. If you want something even more decadent, you can add a layer of crushed graham crackers at the bottom of the shell to lean into the "pie" theme. For those who love a bit of fruit, these pair beautifully with a few fresh raspberries tucked into the cream. If you love other citrus treats, you might also like these Raspberry Lemon Heaven Cupcakes for your next party.
| Original Ingredient | Substitute | Why It Works |
|---|---|---|
| Heavy Cream (1/2 cup) | Mascarpone (1/2 cup) | Higher fat content. Note: Results in a denser, richer filling |
| Lemon Curd (1/2 cup) | Lime Curd (1/2 cup) | Similar acidity and sweetness. Note: Shifts flavor to a "Key Lime" style |
| Powdered Sugar (1/4 cup) | Icing Sugar (1/4 cup) | Identical properties; just regional naming |
| Pre made Shells | Homemade Wafers | More authentic crunch. Note: Requires frying and rolling time |
If you're scaling this recipe, remember that meringue is finicky. If you're doubling the batch (2x), don't just double the beating time. I recommend working in two separate batches for the egg whites to ensure you get the proper aeration.
For the filling, you can easily double it in one bowl, but reduce the liquid lemon juice by about 10% to keep it from getting too loose.
Smart Storage and Preservation
I'll be honest: these are not "make-ahead" desserts in the traditional sense. Once the filling hits the shell, the clock starts ticking. However, you can prep the components separately.
- Filling
- Store the lemon cream cheese mixture in an airtight container in the fridge for up to 3 days. Give it a quick stir before piping.
- Meringue
- This doesn't store well. Make it fresh every time.
- Shells
- Keep them in a dry, airtight container at room temperature for up to 2 weeks.
- Freezing
- You can freeze the unfilled shells for months. Just let them come to room temperature before filling.
For zero waste, don't toss those lemon peels after zesting. You can freeze the peels in a small bag and add them to your sugar canister to make lemon infused sugar, or simmer them in a pot of water to create a natural citrus cleaner for your counters.
Best Pairings for This Treat
Since the Lemon Pie Cannoli is quite rich and sweet, you want something to balance that intensity. A glass of chilled Prosecco or a light Moscato is the classic choice here. The bubbles cut through the cream cheese and highlight the lemon's brightness.
If you're serving these as part of a larger meal, keep the preceding courses light. I love starting a dinner with a Classic House Salad because the crisp garden vegetables cleanse the palate, making the rich lemon cream feel like a reward at the end.
Decision Shortcut for Serving:
- If you want "Wow Factor" → Use the torch for toasted peaks.
- If you're in a rush → Skip the meringue and dust with powdered sugar.
- If you're serving kids → Use mini cannoli shells for bite sized portions.
Clearing Up Dessert Myths
You might hear that you need to "temper" your lemon curd before adding it to the cheese. Honestly, as long as the curd is at room temperature, you don't need to overcomplicate it. Just stir it in.
Another common myth is that homemade shells are always better. While they are great, high-quality pre made shells are often more consistent in thickness, which means they don't crack as easily when you're piping in a thick filling. For a stress free treat, pre made is the way to go.
Recipe FAQs
Can I fill the cannoli shells a few hours before serving?
No, fill them immediately before serving. Filling them too early allows the shells to absorb moisture, turning them soggy and limp.
Can I use only lemon curd for the filling?
No, the filling will be too runny to stay in the shell. The cream cheese provides the structural anchor needed to keep the center plump. If you love this sweet tart balance, see how we use a similar acid technique in our baby lemon pies.
How to get the meringue peaks golden brown?
Use a kitchen torch to lightly brown the surface. Move the flame quickly across the peaks until they are toasted and golden brown.
Why is my lemon cream mixture lumpy?
Ensure your cream cheese is fully softened before beating. Cold cream cheese resists blending, making it difficult to achieve a smooth, lump free consistency with the powdered sugar.
Is it true that egg whites must be cold for the meringue to stiffen?
No, this is a common misconception. Room temperature egg whites whip up more efficiently and reach a higher volume for glossy, stiff peaks.
How to fold the whipped cream into the lemon mixture?
Gently stir the cream in using a spatula. Use a folding motion rather than whisking to keep the air intact for a velvety, uniform consistency.
Can these be stored in the refrigerator?
Only if you store the shells and filling separately. Keep the lemon cream in a piping bag in the fridge and fill the shells just before eating to maintain the crunch.
Lemon Pie Cannoli