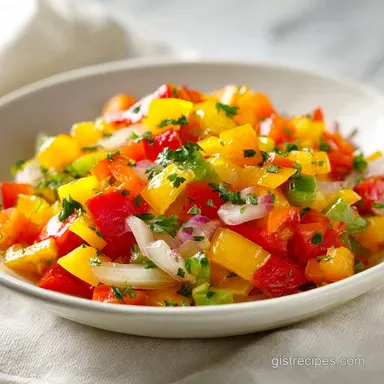
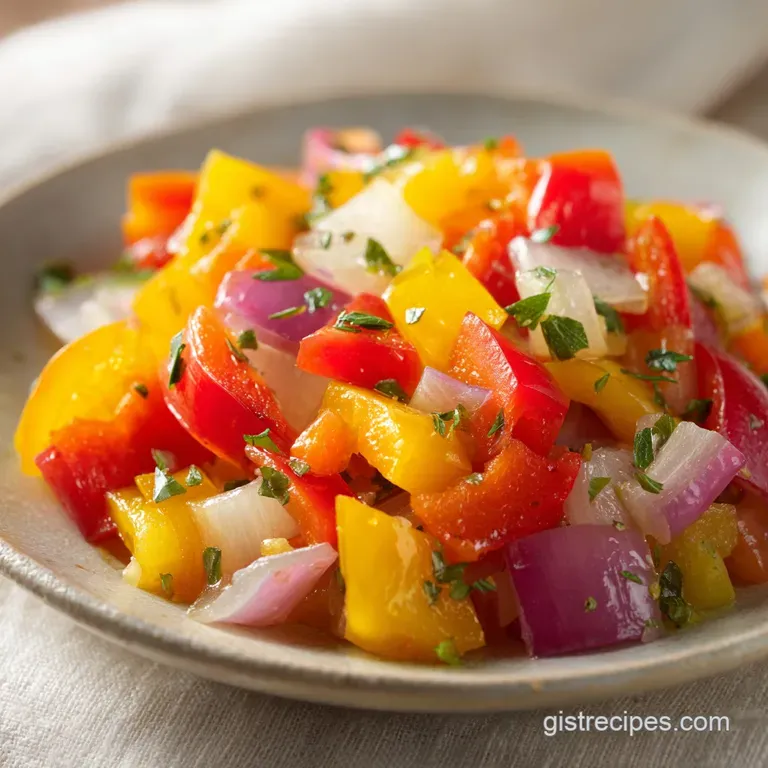
Pickled Pepper Onion Relish: Tangy and Crisp
- Time:15 minutes active + 2 hours chilling = Total 2 hours 15 mins
- Flavor/Texture Hook: Tangy, crisp, and shatter fresh
- Perfect for: BBQ platters, burger nights, or meal prep
Pickled Pepper Onion Relish
The sharp, vinegary scent hits you the second the brine reaches a boil, cutting through the kitchen air with a bright, stinging energy. I remember the first time I tried a store-bought relish on a homemade burger, and honestly, it was a letdown.
It was a sugary, limp mess that felt more like a jam than a condiment, completely masking the flavor of the meat instead of enhancing it.
The problem with most relishes is the over cooking. People simmer the vegetables until they're soft, which kills the texture. You want a condiment that provides a contrast, something that shatters when you bite into it.
This recipe is my fix for that soggy texture, focusing on a precise, short heat window that preserves the cell walls of the peppers and onions.
You'll end up with a vibrant, multicolored topping that brings a savory, zesty edge to any dish. This Pickled Pepper Onion Relish isn't just a side, it's the tool that balances the entire plate. Let's crack on and get this made.
Why This Brine Works
To get that restaurant quality snap, you can't just throw things in a jar. There's a specific logic to how the ingredients interact during that short simmer.
- Osmotic Pressure: Salt and sugar draw moisture out of the vegetables, creating space for the vinegar to penetrate deep into the fibers.
- Acid Sugar Balance: The granulated sugar doesn't just add sweetness, it rounds off the harsh edges of the distilled vinegar for a velvety finish on the tongue.
- Thermal Shock: Bringing the brine to a rolling boil before adding the veg ensures the cooking process is fast, preventing the pectin from breaking down too much.
- Seed Infusion: Mustard and celery seeds release their essential oils only when heated in fat or acid, adding a savory depth that raw seeds lack.
Between the quick pickle method and traditional canning, there's a big difference in the final result. Trust me, for a home cook, the quick version is usually the way to go because the texture stays superior.
| Method | Active Time | Texture | Best For |
|---|---|---|---|
| Quick Pickle | 15 minutes | Extra Crisp | Immediate use, fridge storage |
| Water Bath | 2 hours | Softer/Cooked | Long term shelf storage |
| Cold Soak | 24 hours | Raw/Crunchy | Very mild flavor, short life |
Component Analysis
Not every vinegar or salt is created equal. If you use a coarse sea salt, you'll find grit at the bottom of your jar, which is a total mood killer.
| Ingredient | Science Role | Pro Secret |
|---|---|---|
| White Distilled Vinegar | Primary Acid | Use 5% acidity for a consistent, sharp tang |
| Pickling Salt | Moisture Extraction | Non iodized salt keeps the brine crystal clear |
| Granulated Sugar | Flavor Balancer | Don't swap for honey or it becomes too syrupy |
| Jalapeños | Heat Element | Remove seeds for mild, keep them for a kick |
Essential Gear for Pickling
You don't need a professional lab, but a few specific tools make the process much smoother. First, a large stainless steel saucepan is non negotiable. Avoid aluminum or cast iron, as the high acid content in the vinegar can react with the metal and give your relish a weird, metallic taste.
For the dicing, a very sharp chef's knife is key. You want uniform cubes. If some pieces are huge and others are tiny, the small ones will turn to mush while the big ones stay raw. If you're feeling lazy, a mandoline or a food processor on the pulse setting works, but be careful not to puree the vegetables.
Finally, get some sterilized mason jars. You can quickly sterilize them by running them through a hot dishwasher cycle or rinsing them with boiling water. This prevents any rogue bacteria from spoiling your batch.
Bringing It All Together

Right then, let's get into the actual making. The goal here is speed and precision. We want those vegetables to be translucent but still have a firm bite.
- Dice the bell peppers, onions, and jalapeños into uniform, small pieces. Note: Uniformity ensures the brine penetrates every piece equally.
- In a large stainless steel saucepan, combine white distilled vinegar, granulated sugar, pickling salt, mustard seeds, celery seeds, and black peppercorns.
- Bring the brine mixture to a rolling boil over medium high heat, stirring occasionally until the sugar has completely dissolved and the liquid is clear.
- Stir in the diced bell peppers, onions, jalapeños, and minced garlic.
- Bring the mixture back to a simmer for 5-7 minutes until the vegetables are slightly translucent but still retain their structural integrity.
- Ladle the hot relish into sterilized mason jars, leaving approximately 1/2 inch of headspace.
- Seal the jars tightly and allow them to cool to room temperature on the counter.
- Transfer to the refrigerator.
Chef's Note: For an extra layer of flavor, try adding a pinch of turmeric to the brine. It won't change the taste much, but it gives the onions a beautiful, golden yellow glow that looks amazing in photos.
Precision Checkpoints:
- Boil Point: The brine must be bubbling aggressively (rolling boil) before the veg go in.
- Simmer Window: Exactly 5-7 minutes. 10 minutes is too long; 3 minutes is too short.
- Headspace: Maintain a strict 1/2 inch gap at the top of the jar to allow for expansion and proper sealing.
Fixing Common Issues
Even the best of us mess up a batch occasionally. Usually, it comes down to heat management or ingredient ratios. If your Pickled Pepper Onion Relish feels a bit off, check these common culprits.
Troubleshooting Common Issues
| Issue | Solution |
|---|---|
| Why Your Relish Is Mushy | This almost always happens because of over cooking. If you simmer the vegetables for 15 minutes instead of 7, the cell walls collapse. You lose that "shatter" and end up with a jam. Next time, pull th |
| Why the Brine Is Cloudy | Cloudiness usually comes from using iodized salt or impure vinegar. The iodine in table salt can react with the acid, creating a milky haze. It doesn't affect the taste, but it doesn't look as profess |
| Why It's Too Sour | If the vinegar is overpowering, you likely didn't let the sugar dissolve fully before adding the veg, or your vinegar has a higher acidity than 5%. You can fix this by stirring in a teaspoon of sugar |
Relish Success Checklist:
- ✓ Vegetables are diced to roughly 1/4 inch cubes
- ✓ Brine reached a rolling boil before adding produce
- ✓ Simmer time kept under 8 minutes
- ✓ Jars were sterilized before filling
Flavor Twist Options
Once you've mastered the base Pickled Pepper Onion Relish, you can start playing with the profile. Depending on what you're serving, you might want to shift the heat or the sweetness. This is where you can really make the recipe your own.
For those who want a "Sweet & Smokey" version, stir in a teaspoon of smoked paprika or a drop of liquid smoke during the simmer. This version is a total knockout when paired with a Low Carb Taco Bake, adding a deep, charred flavor that mimics a grill.
If you're going for an old-fashioned style, swap the white vinegar for apple cider vinegar. It's less aggressive and adds a fruity undertone that pairs beautifully with pork. I often serve this as a side alongside my Cornbread with Green Chiles recipe for a full flavored feast.
For a low sugar alternative, you can use a monk fruit sweetener or erythritol. Just be aware that the texture of the brine might be slightly thinner since sugar provides a bit of viscosity. If you want extra heat, double the jalapeños and leave all the seeds in.
Quick Decision Guide:
- If you want BBQ style → Add smoked paprika.
- If you want mild/fruity → Use apple cider vinegar.
- If you want maximum heat → Double the jalapeños and keep seeds.
Storage And Waste
This relish is a powerhouse in the fridge. Because of the high acid content from the vinegar and the salt, it stays fresh for a long time. Store it in an airtight glass jar in the refrigerator for up to 3 weeks.
Avoid using plastic containers, as the vinegar can leach chemicals from the plastic and alter the taste over time.
Freezing Warning: Do not freeze this relish. The freezing process breaks down the cell walls of the vegetables. When you thaw it, you'll be left with a watery, mushy mess. It's just not worth it.
To keep things zero waste, don't toss your onion skins. Collect them in a freezer bag and use them the next time you make a homemade vegetable or beef stock. They add a deep, golden color and a savory base.
Also, any leftover brine can be used as a quick marinade for grilled chicken or as a base for a zesty vinaigrette.
Serving Suggestions
The real magic of this condiment is its versatility. It's designed to cut through fat and add brightness to heavy dishes.
The Ultimate Burger Topper
Instead of just adding a slice of raw onion, pile a generous spoonful of this relish on a juicy beef patty. The acidity cuts through the fat of the meat and the creaminess of the cheese, creating a balanced bite. It's a copycat move used by high end burger joints to make their food taste "brighter".
The Gourmet Charcuterie Board
Spoon the relish into a small ceramic bowl and surround it with sharp cheddar, salami, and cornichons. The sweetness and tang of the pepper and onion relish act as a palate cleanser between the salty meats and rich cheeses. It's an easy way to make a simple snack board feel like a professional spread.
Right then, you've got everything you need to make a batch of this. It's a simple process, but the results are a total game changer for your condiment game. Just remember: don't overcook the veg, keep your jars clean, and enjoy that crunch. Happy pickling!
Recipe FAQs
What is pepper and onion relish used for?
As a zesty topping for sandwiches, burgers, and tacos. The high acidity cuts through rich fats and adds a bright, crunchy contrast to savory meats.
What is Jersey Mike's pepper relish made of?
A combination of bell peppers, yellow onions, jalapeños, and garlic. These are preserved in a brine of white distilled vinegar, sugar, pickling salt, mustard seeds, celery seeds, and black peppercorns.
How long do pickled onions last in a jar in the fridge?
Up to 3 weeks. Keep them in an airtight glass jar to prevent the vinegar from reacting with plastic and altering the flavor.
Can you buy Jersey Mike's pepper relish?
No, it is not available as a retail product. You can only enjoy it as a topping on their sandwiches or by making a copycat version at home.
Why is my relish mushy instead of crunchy?
You likely overcooked the vegetables. Simmering for longer than 7 minutes collapses the cell walls, turning a crisp relish into a jam. This crunch is essential when pairing the relish with shredded beef sandwiches.
Is it true that cloudiness in the brine means the relish is spoiled?
No, this is a common misconception. Cloudiness is usually a reaction between iodized salt and the vinegar's acid, which does not affect the taste or safety.
How to store the relish to maintain quality?
Ladle hot relish into sterilized mason jars leaving 1/2 inch of headspace. Seal the lids tightly and let them cool to room temperature before refrigerating.
Pickled Pepper Onion Relish