Garlic Parmesan Corn on the Cob in 15 Minutes

- Time: 5 mins prep + 10 mins on heat
- Profile: Charred, salty, and buttery
- Perfect for: Bold summer sides or quick weeknight hits
The aroma of garlic butter hitting a searing pan is the true scent of summer. I once served corn at a party that I had simply boiled in water, and it was a complete failure. It tasted like wet paper, and guests just pushed it around their plates.
I learned then that corn requires a generous amount of fat and a quick sear to truly taste like something.
This method focuses on layering tastes. We begin with a quick blanch to tenderize the core, then apply a compound butter, and finish with a high heat blast. You get that viral, golden brown finish and a flavor profile that satisfies every taste bud.
We're creating a version of corn On The Cob that takes risks. It's salty, tangy, and features a sharp cheesy finish that feels like something from a luxury steakhouse. Believe me, once you try it this way, you'll never return to plain boiled corn.
Quick Garlic Parmesan Corn On The Cob
Butter Barrier: Fat prevents the corn from drying out during the sear and carries the garlic flavor deep into the kernels.
Quick Blanch: A short boil ensures the middle is cooked through so the outside can char without the inside staying raw.
Cheese Crust: Adding Parmesan at the very end creates a salty, crispy shell that sticks to the melted butter.
| Method | Prep Time | Texture | Best For |
|---|---|---|---|
| Boiled Only | 2 mins | Soft/Wet | Simple sides |
| Oven Sear | 15 mins | Charred/Crispy | Big flavor hits |
| Air Fryer | 12 mins | Concentrated/Dry | Small batches |
Right then, before we get into the gear, let's look at why these specific ingredients matter. I've tried using margarine or powdered garlic, but the result is just... flat.
The Gear You'll Need
While any basic kitchen works, a few specific tools can streamline the process. A large pot is essential to prevent the corn from crowding and ensure it cooks evenly. For the butter, a small saucepan is your best bet.
If you're using the oven, lining your baking sheet with foil will save you from spending an hour scrubbing burnt butter. I also recommend a silicone brush to ensure the butter reaches every single part of the cob.
The Building Blocks
First, let's look at how these ingredients work together.
| Component | Purpose | Substitute Notes |
|---|---|---|
| Corn | Primary base | Thawed frozen ears are a viable option |
| Unsalted Butter | Richness/Base | Salted is fine; just reduce added salt |
| Parmesan | Savory finish | Pecorino provides a bolder, more pungent flavor |
| Lemon Juice | Brightness | Lime juice creates a zesty, Mexican style twist |
Here is the complete ingredient list. Get everything ready and let's begin.
- 4 large ears of corn, husked Why this? Natural sugars in fresh corn create a better char
- 1 tbsp (15g) kosher salt Why this? The coarse texture is ideal for seasoning water
- 1/2 cup (113g) unsalted butter Why this? Gives you total control over the saltiness
- 3 cloves garlic, minced Why this? Fresh cloves offer a sharper, more potent kick
- 1 tbsp (15ml) fresh lemon juice Why this? Balances out the richness of the butter
- 1/2 tsp (2g) black pepper Why this? Provides a gentle, earthy spice
- 1/3 cup (30g) grated Parmesan cheese Why this? Quickly creates a delicious melted crust
- 1 tbsp (4g) fresh parsley, finely chopped Why this? Brings a pop of color and a clean taste
Recipe Specs
This is a fast moving recipe. Everything happens quickly once the water boils.
- Prep time:5 minutes
- Cook time:10 minutes
- Total time:15 minutes
- Yield: 4 servings
Chef's Note: If your corn ears are massive, you might need to cut them in half to fit the pot. Just don't overcrowd them, or they'll steam instead of boiling.
From Prep to Plate
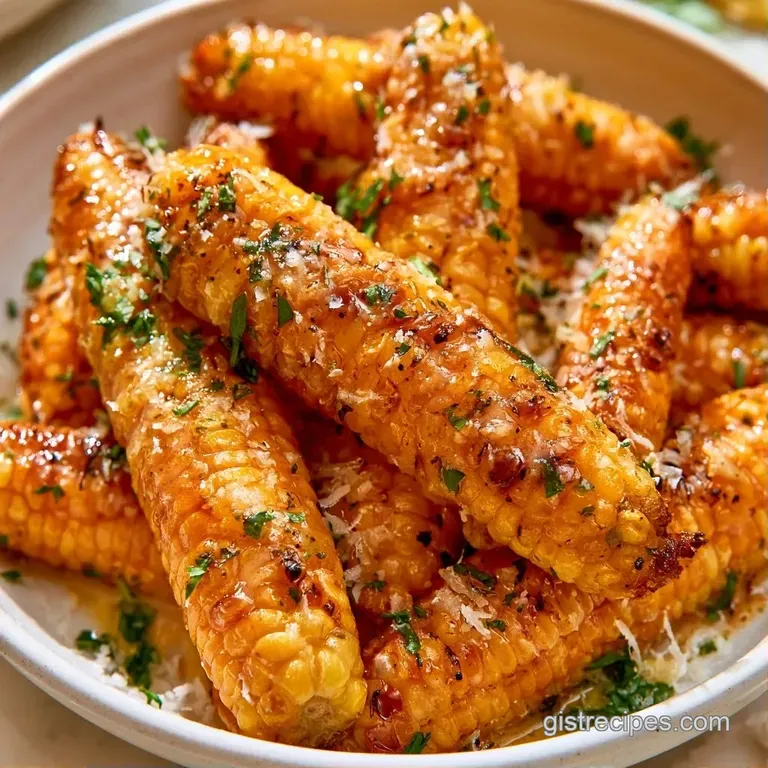
Let's crack on. Follow these steps and you'll have a side dish that actually steals the show.
- Fill a large pot with water and add the kosher salt. Bring it to a rolling boil.
- Drop the corn into the water. Boil for 3–5 minutes until the kernels look bright and plump. Note: Don't overboil or they get rubbery
- Melt the butter in a small saucepan over low heat.
- Stir in the minced garlic and sauté for 1–2 minutes until it smells nutty. Note: If the garlic turns brown, it'll taste bitter
- Stir in the lemon juice and black pepper, then pull the pan off the heat.
- Fish the corn out of the water. Pat each ear dry with a paper towel. Note: Wet corn won't brown, it just steams
- Brush the garlic butter generously over the corn On The Cob.
- Put the ears on a grill or in a 400°F (200°C) oven for 3–5 minutes. Turn them occasionally until you see golden brown char spots.
- Take them out and immediately roll the hot ears in the grated Parmesan.
- Finish with a sprinkle of fresh parsley for that pop of green.
Pro Tips & Pitfalls
Dealing with corn On The Cob can be tricky if you've never seared it before. The biggest issue people have is the "soggy" factor. If you don't dry the corn after boiling, the butter just slides off and you'll never get those charred spots.
Another thing: garlic is a diva. It burns in seconds if the heat is too high. Keep that butter on low. If you see the garlic turning dark brown before the corn is even ready, you've gone too far. Start over or just be more careful with the flame.
Fixing Rubbery Kernels
Overcooking is the enemy here. If you boil the corn for 10 minutes instead of 5, you'll destroy the cell walls and end up with a chewy mess. Keep it short.
Preventing Burnt Garlic
If the garlic smells acrid or looks dark, it's burnt. Use low heat and remove the butter from the stove the second it smells fragrant.
Solving Bland Flavor
If the dish tastes flat, you're missing acid. A tiny extra squeeze of lemon juice at the end wakes up the butter and salt.
| Problem | Root Cause | Solution |
|---|---|---|
| Corn won't brown | Too much surface moisture | Pat dry with towels before buttering |
| Bitter taste | Burnt garlic cloves | Use lower heat and sauté for 2 mins max |
| Cheese won't stick | Corn cooled down too much | Roll in cheese immediately after oven/grill |
Freezing and Reheating Guide
Store leftover corn in an airtight container in the refrigerator for up to 2 days. To maintain the right texture, avoid using a microwave, as it can make the corn mushy. Instead, pop it into a 400°F (200°C) oven for 5 minutes to crisp up the butter and cheese again.
I wouldn't suggest freezing the Garlic Parmesan version because the cheese doesn't hold up well. Instead, freeze the blanched corn before adding the butter. To serve, let it defrost and then proceed with the buttering and searing steps.
To minimize waste, hold onto the corn husks. They are excellent for composting if you have a garden. Alternatively, for a more gourmet touch, simmer the husks with celery and onion to create a simple corn stock for your soups.
Mix It Up
If you want to pivot the flavor, it's easy. For a spicy Mexican style hit, swap the Parmesan for Cotija cheese and add a dash of chili powder to the butter.
If you're using frozen corn, try this frozen corn recipe to get the timing right. For a vegan version, use a high-quality plant based butter and nutritional yeast instead of the Parmesan. It gives a similar nutty, cheesy vibe without the dairy.
You can also add a teaspoon of smoked paprika to the garlic butter. It gives the corn On The Cob a deep, campfire flavor that pairs well with grilled meats.
| Budget Item | Premium Choice | Budget Alternative | Impact |
|---|---|---|---|
| Butter | Grass fed | Unsalted stick | Less richness |
| Cheese | Freshly grated | Pre shredded | Shredded has cornstarch, melts slower |
| Garlic | Fresh cloves | Garlic powder | Loss of aromatic punch |
How to Serve and Enjoy
This dish is a powerhouse side. It pairs best with something heavy, like a ribeye or a smash burger. I love serving it on a large wooden platter with a few lemon wedges on the side so people can add more zing if they want.
If you love the charred look but want a different heat source, my grilled corn guide has a few more tips on managing open flames.
Keep the corn On The Cob hot. Once that butter starts to solidify, you lose the silky feel of the sauce. Serve it the second it comes out of the oven.
The Steakhouse Pairing
Pair this with a peppercorn steak. The richness of the meat cuts through the acidity of the lemon and the salt of the Parmesan.
The Summer Feast
Serve it alongside a chilled watermelon salad. The contrast between the hot, salty corn and the cold, sweet melon is a total vibe.
Right then, you're ready. Stop reading and go get some corn On The Cob in your life. Trust me, your taste buds will thank you.
Recipe FAQs
How to make buttered garlic corn on the cob?
Boil corn for 3-5 minutes, brush with sautéed garlic butter, and sear at 400°F (200°C) for 3-5 minutes.
Tip: Pat the cobs completely dry after boiling so the butter sticks better.
Is it true you must boil corn for 10 minutes to make it tender?
This one's false: A quick 3-5 minute boil is enough to ensure the interior is tender.
Tip: Overboiling can make the kernels mushy and lose their snap.
What is the most flavorful way to cook corn on the cob?
Blanching the corn followed by a high heat sear with garlic butter and Parmesan provides the best taste.
Tip: Use a grill for a deeper, smokier char if an oven isn't available.
How do I cook fresh sweet corn?
Drop husked ears into boiling salted water for 3-5 minutes before finishing them in the oven or on a grill.
Tip: Use kosher salt in the water to season the kernels from the inside out.
Which toppings best enhance cooked corn on the cob?
Grated Parmesan cheese and finely chopped fresh parsley added immediately after cooking create a savory crust.
Tip: Roll the hot corn in the cheese so it melts slightly and adheres to the butter.
Should garlic be added to the boiling water?
No, this is a common misconception: Sautéing the garlic in butter separately prevents it from burning during the high heat sear.
Tip: Sauté the garlic over low heat for just 1-2 minutes until fragrant.
Garlic Parmesan Corn On The Cob