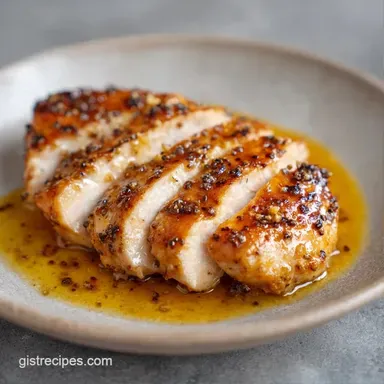
Pan Seared Chicken Breast: Juicy and Golden
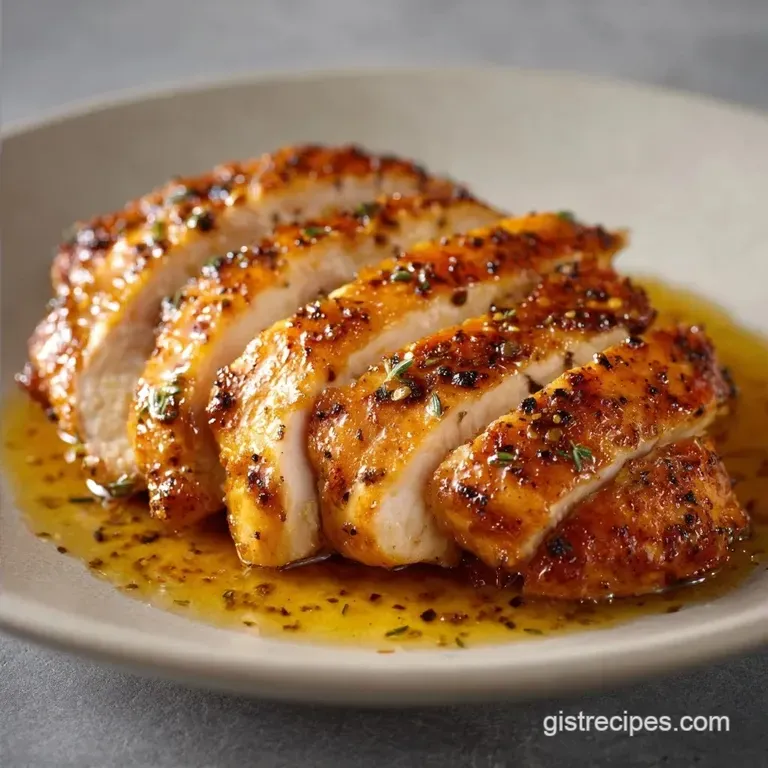
- Time: 5 min active + 15 min cook
- Flavor/Texture Hook: Golden brown crust with a velvety lemon butter finish
- Perfect for: Weeknight dinner or a fast date night meal
That sharp, aggressive sizzle is the only sound that matters when the meat hits the hot oil. I remember the first time I tried to do this without pounding the breasts. I had these massive, uneven pieces of meat where the thin end was basically charcoal and the thick center was still practically raw. It was a mess.
I spent ten minutes trying to "save" it, but you can't undo an uneven sear.
Once I started flattening the chicken to a consistent thickness, everything changed. The meat hits the pan and browns evenly across the whole surface. No more guessing games or cutting into the meat to see if it's done. This is about getting that savory, salt crusted exterior while keeping the inside juicy.
You can expect a dish that feels fancy but takes almost no effort. We're talking about a golden crust that almost shatters when you cut into it, topped with a sauce that's bright and buttery. This Pan Seared Chicken is my go to when I want something that tastes like a bistro meal but doesn't require a culinary degree.
Pan Seared Chicken with Lemon Butter
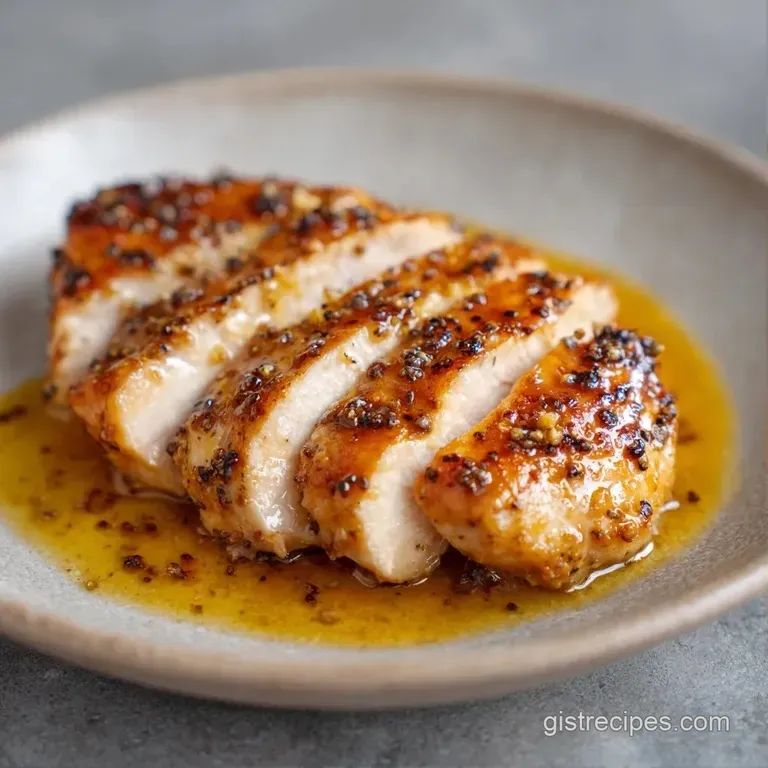
Why the Heat Matters
The secret here isn't a fancy ingredient, it's the temperature of your skillet. If the pan is too cold, the chicken just steams in its own juices, and you end up with a gray, rubbery piece of meat. You want the oil shimmering, almost smoking, so the proteins sear instantly.
Surface Dryness: Moisture is the enemy of browning. Patting the meat dry prevents the oil from splattering and lets the heat hit the protein directly.
Even Thickness: Pounding the meat to 3/4 inch ensures the center reaches 160°F at the exact same time the outside turns golden.
The Fond Factor: Those brown bits stuck to the pan are called fond. Deglazing these with broth pulls all that concentrated flavor back into the sauce.
Carryover Cooking: Taking the meat off at 160°F allows it to climb to the safe 165°F while resting, which keeps the fibers from tightening and pushing out the juice.
| Detail | Fast Method | Classic Method |
|---|---|---|
| Meat Prep | Pounded thin | Left whole |
| Sear Time | 5-7 mins per side | 10-12 mins per side |
| Finish | Pan sauce | Oven finish |
The Component Breakdown
| Ingredient | Science Role | Pro Secret |
|---|---|---|
| Olive Oil | Heat conductor | Use a high smoke point oil to avoid burnt tastes |
| Unsalted Butter | Emulsifier | Add at the end for a velvety texture |
| Lemon Juice | Acid balance | Cuts through the fat of the butter |
| Garlic Powder | Dry seasoning | Layers flavor without burning like fresh garlic does during the sear |
Shopping List Breakdown
For the best results, get the freshest breasts you can find. I usually go for the organic ones if they're on sale, but any boneless skinless breast works. Just avoid the "pre sliced" ones as they often leak too much water.
- 1.5 lbs boneless skinless chicken breasts Why this? Standard size for 4 servings, easy to pound
- 2 tbsp olive oil Why this? High heat stability
- 1 tsp kosher salt Why this? Larger grains for better control
- 1/2 tsp cracked black pepper Why this? Coarse grind adds texture
- 1 tsp garlic powder Why this? Even coverage without burning
- 2 tbsp unsalted butter Why this? Controls the salt level in the sauce
- 3 cloves garlic, minced Why this? Fresh punch in the final sauce
- 1/2 cup low sodium chicken broth Why this? Base for the pan sauce
- 1 tbsp fresh lemon juice Why this? Brightens the savory notes
- 1 tbsp fresh parsley, chopped Why this? Fresh, herbal finish
If you're out of lemon, a splash of white wine vinegar works, though it's a bit sharper. For the broth, you can use water and a pinch of bouillon, but the real broth has a better mouthfeel.
The Right Gear
You really want a stainless steel or cast iron skillet for this. Non stick pans are fine for eggs, but they don't develop that brown fond on the bottom. Without that crust, your sauce will taste thin and boring.
I use a 12 inch skillet. If your pan is too small, you'll crowd the meat, which drops the temperature and leads to steaming instead of searing. If you're doing a big batch, work in two turns. Trust me, crowding the pan is the fastest way to ruin a Pan Seared Chicken recipe.
A meat mallet is also a must. If you don't have one, a heavy rolling pin or even the bottom of a sturdy skillet works. Just put the meat in a plastic bag first so you aren't splashing raw chicken juice all over your counters.
Step by step Searing
- Pat the chicken breasts completely dry with paper towels. Note: This ensures a better crust. Use a meat mallet to pound the thickest part of the breast until it is an even thickness of about 3/4 inch.
- Season both sides of the chicken generously with salt, pepper, and garlic powder.
- Heat olive oil in a 12 inch stainless steel or cast iron skillet over medium high heat until it shimmers.
- Place chicken in the pan, leaving space between pieces. Sear undisturbed for 5–7 minutes until a golden brown crust forms.
- Flip the chicken and cook for another 5–7 minutes, or until the internal temperature reaches 160°F (71°C). Remove chicken to a plate to rest.
- Reduce heat to medium. Add butter to the pan; once foaming, stir in minced garlic for 30 seconds.
- Pour in chicken broth and lemon juice, scraping the bottom of the pan to release the browned bits. Simmer for 2–3 minutes until reduced by half.
- Stir in chopped parsley and pour the sauce over the rested chicken breasts.
Chef's Note: Don't move the chicken the second it hits the pan. Let it sit for at least 4 minutes. The meat will actually "release" itself from the pan once the crust is properly formed. If you tug at it and it sticks, it's not ready to flip.
Troubleshooting the Sear
Getting the heat right can be tricky the first few times. The most common issue is the meat sticking to the pan. This usually happens because the pan wasn't hot enough or you tried to flip it too early.
Another issue is the chicken drying out. This happens if you skip the resting phase or overcook it past 165°F. Remember, the temperature keeps rising after you take it off the heat.
Why Your Meat Sticks
If the chicken is glued to the pan, you've likely missed the window where the proteins sear and release. Lower the heat slightly and wait another minute.
| Problem | Root Cause | Solution |
|---|---|---|
| Meat sticking | Pan too cold or flipped too soon | Wait for golden crust to release meat |
| Dry interior | Overcooked or no resting time | Pull at 160°F and rest 5 mins |
| Sauce too thin | Not enough reduction time | Simmer 1-2 mins longer until syrupy |
Common Mistakes Checklist
- ✓ Did you pat the meat dry?
- ✓ Is the thickness even across the breast?
- ✓ Did you let the oil shimmer before adding meat?
- ✓ Did you avoid crowding the pan?
- ✓ Did you let the meat rest before saucing?
Customizing Your Chicken
If you want to switch things up, you can easily use thighs instead of breasts. Quick pan seared chicken thighs are more forgiving because they have more fat, meaning they stay juicy even if you overcook them by a few minutes. Just increase the sear time slightly since they're often thicker.
For a different vibe, you can make pan seared chicken bites. Just cube the meat into 1 inch pieces, season them, and sear them for about 3 minutes per side. They cook much faster, but you lose some of the velvety texture of the full breast.
If you're looking for something even faster, you might like my Garlic Chicken Skillet which uses a similar over high heat approach. For a creamy twist, stir a tablespoon of heavy cream or a dollop of Greek yogurt into the sauce at the very end.
Adjustment Guide - Scaling Down (1-2 people): Use a smaller skillet and reduce the broth by half. Your cook time will stay roughly the same, but the sauce will reduce faster. - Scaling Up (6-8 people): Work in batches.
If you put 8 breasts in one pan, you'll end up with boiled chicken. Season all the meat first, sear in two groups, and keep the first batch warm in a low oven (200°F).
Leftover Guidelines
Store any remaining Pan Seared Chicken in an airtight container in the fridge for up to 3 days. I recommend storing the sauce separately if you have extra, as it keeps the crust from getting soggy.
For the freezer, you can freeze the cooked breasts for up to 2 months. Let them cool completely before freezing. When you're ready to eat, thaw them in the fridge overnight.
To reheat, avoid the microwave if you can. It turns the chicken into rubber. Instead, put the meat in a pan over medium heat with a splash of water or broth. Cover it with a lid for 2-3 minutes to steam it back to life without drying it out.
To avoid waste, use any leftover pan sauce as a glaze for roasted carrots or potatoes. If you have a few scraps of chicken left, shred them into a wrap or a salad for lunch the next day.
Serving and Pairing
This dish is all about balance. The rich butter and savory garlic need something fresh to cut through them. I always serve this with a Classic House Salad to add some crunch and acidity to the plate.
For a heartier side, steamed asparagus or sautéed spinach works great. The lemon butter sauce from the chicken tastes incredible when it runs into the vegetables. If you want a starch, some mashed cauliflower or a wild rice blend keeps the meal feeling light.
When plating, slice the breast on a bias. This shows off the juicy interior and gives you more surface area for that velvety sauce to cling to. Sprinkle a bit more fresh parsley on top for a pop of color.
This Pan Seared Chicken looks and tastes like something you'd pay 30 bucks for at a restaurant, but it's way better because you actually seasoned it properly.
High in Sodium
810 mg 810 mg of sodium per serving (35% 35% of daily value)
The American Heart Association recommends that most adults limit their sodium intake to no more than 2,300 mg per day to reduce the risk of hypertension.
Tips to Reduce Sodium
-
Swap the Broth-30%
Replace the low-sodium chicken broth with homemade unsalted chicken stock or water to significantly cut sodium.
-
Reduce Added Salt-25%
Omit or reduce the 1 tsp kosher salt, as the broth and garlic powder already provide a flavor base.
-
Increase Acidity-10%
Add an extra tablespoon of fresh lemon juice to enhance the natural flavors and mimic the 'zing' of salt.
-
Fresh Herb Boost
Double the amount of fresh parsley and cracked black pepper to add depth and complexity without adding sodium.
Recipe FAQs
How to sear chicken quickly?
Pound the chicken to an even 3/4 inch thickness. This ensures the meat cooks uniformly and reaches 160°F faster without drying out the exterior.
How to cook chicken for diabetic patients?
Focus on the low-sodium broth and lemon juice for flavor. These ingredients provide a savory profile without adding sugars that spike blood glucose.
How to cook chicken for someone with gastritis?
Exclude the black pepper and lemon juice. Removing these acidic and spicy ingredients helps prevent stomach lining irritation.
Can a diabetic eat baked chicken?
Yes, baked chicken is a healthy choice. It provides lean protein without the added sugars or breading found in processed options.
What's a great, but simple, chicken breast recipe?
This lemon garlic pan-sear is a perfect option. It takes only 20 minutes; for more inspiration, try this fast weeknight meal for a similar flavor profile.
Quick pan seared chicken thighs?
Yes, you can use the same searing technique. Thighs simply require a few extra minutes per side to ensure the fat is fully rendered.
Is it true that flipping chicken frequently creates a better sear?
No, this is a common misconception. Leaving the chicken undisturbed for 5 7 minutes is essential for developing a proper golden brown crust.
Pan Seared Chicken Breast