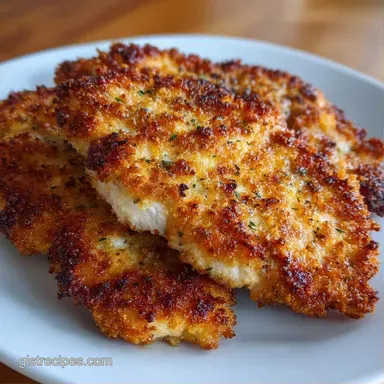
Tender Baked Chicken Recipe: Golden and Juicy
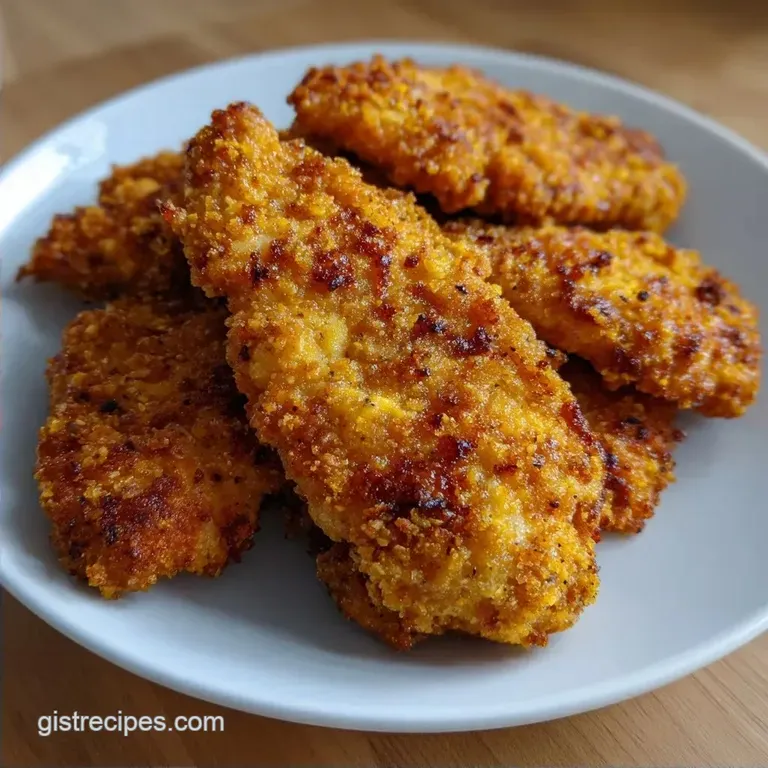
- Time: 10 min active + 20 min baking
- Flavor/Texture Hook: Mahogany gold crust with juicy, tender centers
- Perfect for: Weeknight family dinners or kid friendly meal prep
- The Best Tender Baked Chicken Recipe
- Recipe Basics
- Tools You'll Need
- Bringing the Meal Together
- Fixing Common Cooking Issues
- Troubleshooting Common Issues
- Flavor Twists and Swaps
- Adjusting the Batch Size
- Kitchen Myths
- Storage and Leftover Tips
- Serving and Enjoying
- High in Sodium
- Recipe FAQs
- 📝 Recipe Card
The smell of toasted Panko and paprika hitting a hot oven always takes me back to Sunday afternoons at my grandma's house. She didn't have fancy gadgets, just a well worn baking sheet and a knack for making the simplest things feel like a feast.
I remember watching her pat the chicken dry with an intensity that felt like a ritual, insisting that any bit of moisture on the surface was the enemy of a good crunch.
For a long time, I struggled with chicken breasts that came out like rubber bands. I thought the secret was some expensive marinade or a high end oven, but it turns out it was all about the sequence of the breading and the final temperature.
Once I stopped guessing and started tracking the internal heat, everything shifted.
This Tender Baked Chicken Recipe is the result of those little lessons. It's a hearty, comforting dish that doesn't require hours of prep but gives you that satisfying, velvety texture inside and a loud crunch on the outside. It's the kind of meal that makes the whole house smell warm and inviting.
The Best Tender Baked Chicken Recipe
Many people treat baking chicken like a guessing game, tossing it in the oven and hoping for the best. The real problem is that chicken breast has very little fat, so it dries out the second it overcooks. Most recipes tell you to bake until "golden brown," but color is a liar.
You can have a mahogany colored piece of chicken that is dry as a bone, or a pale piece that is perfectly juicy.
The trick is the dredging station and the resting period. By coating the meat in flour, then egg, then Panko, you're building a wall that prevents the steam from escaping too quickly. This keeps the meat tender while the outside crisps up.
Right then, let's look at what makes this actually work.
Why the Crust Stays Crisp
- The Flour Base: Flour absorbs surface moisture and gives the egg something to grip onto.
- Egg Binding: The beaten eggs act as a glue, creating a protein layer that holds the breadcrumbs tight.
- Panko Texture: These larger flakes create more surface area for the heat to hit, leading to a shatter crisp finish.
- High Heat: 200°C (400°F) is the sweet spot where the fat in the oil sizzles the crumbs before the meat overcooks.
- Airflow: Leaving space between the pieces prevents them from steaming each other, which would make the bottom soggy.
| Method | Time | Texture | Best For |
|---|---|---|---|
| Oven Baked | 20 mins | Even, light crunch | Large batches / Healthy |
| pan fried | 12 mins | Heavy, oily crisp | Single servings / Richness |
| air fried | 15 mins | Very dry, hard crunch | Ultra fast / Small portions |
Ingredient Deep Dive
| Ingredient | Science Role | Pro Secret |
|---|---|---|
| Panko Crumbs | Structural crunch | Press firmly into the meat for a thicker shell |
| All Purpose Flour | Moisture barrier | Shake off excess to avoid "clumping" |
| Beaten Eggs | Protein adhesive | Add a pinch of salt to the eggs for deeper flavor |
| Olive Oil | Heat conductor | Coats the meat first to help breading stick |
Recipe Basics
When gathering your ingredients, stick to the specifics. Using the right breadcrumbs makes a world of difference here. Panko is coarser than standard breadcrumbs, which is why it doesn't turn into a paste in the oven.
For the Chicken
- 1.5 lb chicken tenderloins or sliced breastWhy this? Consistent thickness ensures even cooking
- 1 tbsp olive oilWhy this? Helps seasonings adhere and prevents sticking
- 1/2 tsp saltWhy this? Basic flavor enhancer
- 1/4 tsp black pepperWhy this? Adds a subtle, woody heat
For the Breading
- 1/2 cup all purpose flourWhy this? Creates the primary bond
- 2 large eggs, beatenWhy this? The necessary glue for the Panko
- 1 cup Panko breadcrumbsWhy this? For that signature light, airy crunch
- 1 tsp garlic powderWhy this? Savory depth without burning fresh garlic
- 1 tsp paprikaWhy this? Provides the golden mahogany color
- 1/2 tsp saltWhy this? Seasons the crust separately from the meat
| Original Ingredient | Substitute | Why It Works |
|---|---|---|
| Panko Breadcrumbs | Regular Breadcrumbs | Finer texture. Note: Becomes denser and less "shattery" |
| All Purpose Flour | Almond Flour | Low carb option. Note: Breading is more fragile; don't shake too hard |
| Olive Oil | Melted Butter | Richer flavor. Note: Browns faster, watch for burning |
| Paprika | Smoked Paprika | Adds wood smoke notes. Note: Stronger flavor, use sparingly |
Tools You'll Need
You don't need a professional kitchen for this, but a few things make it easier. I always use a large rimmed baking sheet. If the sheet is too small and the chicken is crowded, they'll steam instead of bake, and you'll lose that crunch.
Parchment paper is a must. I've spent too many nights scrubbing burnt breadcrumbs off a pan. A simple sheet of parchment means you can slide the whole batch off at once and cleanup takes about ten seconds.
Finally, a digital meat thermometer is the only "fancy" tool I insist on. According to Serious Eats, carryover cooking is a real thing. Taking the chicken out a few degrees early ensures it doesn't overcook while resting.
Bringing the Meal Together
Let's get into the actual process. Trust me on the drying part - it's the most skipped step and the biggest reason for peeling breading.
- Pat the chicken completely dry with paper towels. Note: Damp meat creates a steam layer that pushes the breading off.
- If using tenderloins, remove the white tendons. Note: Use a paper towel for grip to pull them out cleanly.
- Toss the chicken pieces in olive oil, 1/2 tsp salt, and 1/4 tsp black pepper. Note: This seasons the meat directly.
- Set up your dredging station. Use three separate bowls: flour in one, beaten eggs in the second, and Panko mixed with garlic powder, paprika, and 1/2 tsp salt in the third.
- Dip each piece in flour, shake off the excess, dip in the eggs, and then press firmly into the Panko mixture. Note: Pressing hard ensures the crumbs don't fall off in the oven.
- Preheat your oven to 400°F (200°C) and line a baking sheet with parchment paper.
- Place chicken on the sheet with space between pieces. Bake for 15-20 minutes until the crust is golden and smells toasted.
- Remove from oven when the thickest part reaches 160°F (71°C). Let rest for 5 minutes until it reaches 165°F (74°C).
Chef's Tip: If you want an extra dark crust, you can lightly spray the breaded chicken with a bit of cooking oil right before it goes into the oven. It helps the Panko brown more evenly.
Fixing Common Cooking Issues
Even the best of us hit a snag. Usually, if something goes wrong with this Tender Baked Chicken Recipe, it's a matter of temperature or moisture.
Troubleshooting Common Issues
| Issue | Solution |
|---|---|
| Why did my breading fall off | This usually happens because the chicken was too wet when you started or you didn't press the Panko in firmly enough. |
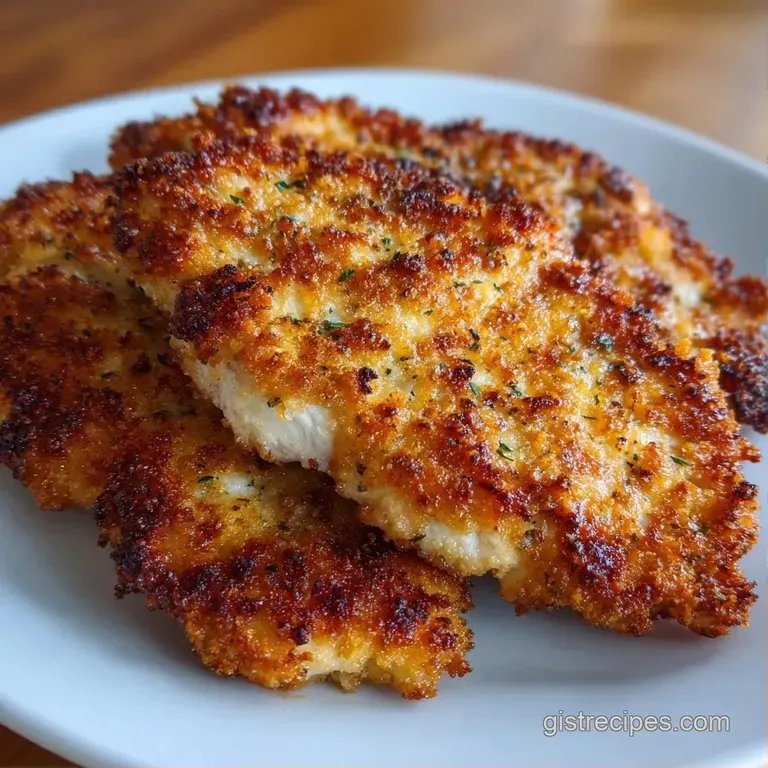
| Why are my tenders pale | Pale chicken usually means the oven temperature was too low or the pieces were crowded. When chicken is too close together, they release steam that keeps the crust moist. |
| Why is the meat dry | Dry meat is almost always a result of overcooking. Even two extra minutes can turn a juicy breast into cardboard. Rely on your thermometer, not the timer. |
Common Mistakes Checklist
- ✓ Did you pat the chicken dry with paper towels?
- ✓ Did you remove the white tendons from the tenderloins?
- ✓ Did you leave at least one inch of space between each piece?
- ✓ Did you pull the meat out at 160°F (71°C) to allow for carryover?
- ✓ Did you press the Panko firmly into the meat?
Flavor Twists and Swaps
Once you've got the basics down, you can play with the crust. I love adding a handful of grated Parmesan cheese to the Panko for a salty, nutty flavor. It browns beautifully and adds a bit of a "shatter" to the crust.
If you want something with a bit more punch, try adding a pinch of cayenne pepper or smoked paprika. For those who love a dip, this pairs wonderfully with a Creamy Sweet Chili Sauce for a sweet and spicy contrast.
Looking for a gluten-free version? You can swap the flour for cornstarch and use gluten-free Panko. The cornstarch actually creates a very crisp shell, though it's a bit more delicate than the all purpose version.
Adjusting the Batch Size
Cooking for two or cooking for ten requires a few tweaks. You can't just multiply everything and expect the same result.
Scaling Down (Half Batch) If you're only making 0.75 lb of chicken, use a smaller baking sheet. The bake time usually drops by about 2-3 minutes because there's less mass in the oven. For the eggs, beat two but only use about half of the mixture.
Scaling Up (Double or Triple Batch) When doubling the recipe, don't double the salt and spices exactly - go to about 1.5x instead. Spices can become overpowering in large volumes. Most importantly, work in batches. If you crowd one tray, the chicken will steam.
Use two separate trays and rotate them halfway through the baking time to ensure even browning.
| Batch Size | Tray Setup | Temp Adjustment | Time Adjustment |
|---|---|---|---|
| Single | 1 Small Tray | None | Standard |
| Double | 2 Large Trays | None | Add 2-5 mins |
| Triple | 3 Large Trays | Lower 10°C | Add 5-8 mins |
Kitchen Myths
There are a few things people say about chicken that just aren't true. Let's clear the air.
The "Sealing" Myth Many believe that searing meat "seals in the juices." It doesn't. Moisture loss happens throughout the cooking process. The crust is for flavor and texture, not for creating a waterproof seal around the meat.
The "Room Temp" Myth Some say you must let chicken reach room temperature before baking. For thin tenders, this isn't necessary and can actually be a food safety risk. Just pat them dry and get them in the oven.
Storage and Leftover Tips
If you have leftovers, store them in an airtight container in the fridge for up to 3 days. To keep them from getting soggy, place a piece of paper towel at the bottom of the container to absorb excess moisture.
For the freezer, let the chicken cool completely, then freeze them in a single layer on a tray before transferring them to a bag. This prevents them from clumping together. They'll stay good for about 2 months.
To reheat, avoid the microwave. It turns the crust into a sponge. Instead, pop them back in the oven at 175°C (350°F) for about 10 minutes. This brings back the crispiness without overcooking the center.
As for zero waste, if you're using whole breasts and have scraps, save the trim for a chicken salad or toss them into a soup. Even the leftover flour egg mixture can be used as a binder for homemade veggie burgers.
Serving and Enjoying
This dish is all about the contrast. I love serving it with something bright and acidic to cut through the richness of the breading. A simple side of steamed green beans or a crisp coleslaw works wonders.
For a more comforting meal, this goes great with a Family Meal Roast side of root vegetables. The juicy, tender meat and the shatter crisp crust make it a hit with everyone from toddlers to grandparents.
Right then, you've got everything you need for a Tender Baked Chicken Recipe that actually delivers. Just remember: pat it dry, watch the temperature, and let it rest. Your dinner guests (and your stomach) will thank you.
High in Sodium
840 mg 840 mg of sodium per serving (37% 37% of daily value)
The American Heart Association recommends a daily limit of 2,300 mg of sodium to lower blood pressure and reduce the risk of heart disease.
Tips to Reduce Sodium
-
Remove Added Salt-25%
Eliminate the 1/2 tsp salt used for seasoning the chicken. Use a squeeze of fresh lemon juice to mimic the flavor profile.
-
Omit Breading Salt-25%
Skip the 1/2 tsp salt in the Panko mixture. The breadcrumbs often contain enough inherent sodium for flavor.
-
Unsalted Panko-15%
Check your labels and switch to an unsalted Panko breadcrumb brand to avoid hidden sodium sources.
-
Enhance with Herbs
Add dried oregano, thyme, or smoked paprika to the coating for a richer taste without adding salt.
Recipe FAQs
How to bake chicken so that it is tender?
Bake at 400°F (200°C) for 15-20 minutes. Use a meat thermometer to pull the chicken when the thickest part hits 160°F (71°C) and let it rest to reach 165°F (74°C).
Can a diabetic eat baked chicken?
Yes, baked chicken is generally diabetes-friendly. This recipe uses lean protein and basic seasonings that fit most low-glycemic diets.
What is the secret to juicy tender chicken?
Avoid overcooking by using an internal thermometer. Even two extra minutes can turn juicy meat into cardboard. If you enjoyed mastering this temperature precision, apply the same principle to our pineapple sheet pan chicken.
How to cook chicken so it's soft and tender?
Pat the chicken completely dry with paper towels before dredging. This ensures the breading adheres and helps maintain moisture inside the meat during the bake.
What's a great, but simple, chicken breast recipe?
Toss chicken in olive oil and salt, then use a flour-egg-Panko dredging station. It is a fast way to get a professional, crispy crust at home with minimal cleanup.
Simple tender baked chicken recipe?
Bread sliced breast with garlic powder and paprika and bake at 400°F. This streamlined method delivers tender results in just 30 minutes from prep to table.
Why did my breading fall off?
Ensure the chicken is dry and press the Panko firmly into the coating. Moisture on the surface or loose breadcrumbs are the primary reasons the crust fails to stick.
Tender Baked Chicken Recipe for 4